|
|
||
|
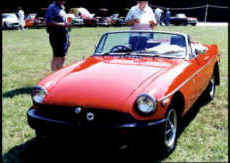
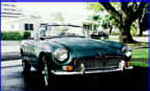
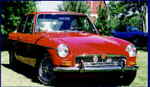
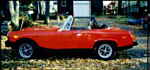
WELCOME TO THE AMERICAN MGB ASSOCIATION |
|
|
|
||
|
Credit Card/PayPal Form
Secured Order Form
Membership Benefits
Members
Only |
||
| |||||||||
| |
|
| |||||||||||
|
TECH TIPS
Winter Car Wash
this is an excerpt from the articles appearing in the
OCTAGON
also see upkeep and performance hints on our message board at board.mgclub.org
Winter Car Wash
by Jim Pyatt
My process for a winter wash has 7 steps and is vital during the winter season. Winter can be a challenge. It's essential that you loosen the dirt on the car with a thorough rinsing.
Step 1 - Engine Compartment, Wheel Wells, Wheels & Tires
With hot water, blast any dirt and mud away from the cowling and engine area. Be careful not to spray the electronics. We are not detailing the compartment, just performing maintenance. We will address engine detailing in the spring. Using the hose, blast mud and salt away from the wheel wells. If necessary, also use your gloves to dislodge caked on mud and salt. Blast until you see a clean stream of water emerging from underneath.
Blast mud and salt from all areas of your undercarriage which you can reach, especially under bumpers and the like. Wheels come in many styles, including polished aluminum, chromed steel, clear-coated aluminum, and painted. No matter what variety you have, brake dust and salt and mud make them difficult to clean. If your wheels have plastic covers or hubcaps, remove them before you begin cleaning. Soak hubcaps in warm soapy water; this will make cleaning easier.
Spray cleaner and scrub wheels and tires thoroughly with soapy water. Use a brush to agitate and remove stubborn mud and salt I use an old toothbrush to reach into tight spots and intricate designs. Use the hose-sprayer attachment to rinse off the soap & dirt.
Step 2 - Surface Soaking
Using your hose with no attachment, start at the top of the car and rinse the dirt with a moderate stream of water from top to bottom. Spray a light mist of water, using your thumb, over the body surface to soak the film of dirt, salt, dust, and grime that has accumulated on the paint finish. By leaving the water to soak for a minute or two, much of the dirt will easily float off the car when you go to wash it.
Never use a pressure washer! It will grind the dirt into the clearcoat and leave micromarring (swirls). It acts like a sandblaster used to remove paint. Now we sure don't want that!
Step 3 - First Washing
After thoroughly rinsing the car, you are ready to get the bulk of the remaining dirt. This is a multistage wash. Use quality car-wash soap. One of the keys is to keep the paint surface wet at all times. Recruit a friend to help. They can keep the water running on the surface at all times.
One reason for swirls is washing with dirty water. Avoid swirls by using a water filtration system like the Dirtguard auto wash system. Start on the top and work in 3x3-foot small areas dipping your brush into the dirtgard bucket. Rub the brush against the insert frequently. This acts like a washboard, removing the dirt from your brush. Rinse each area with water before proceeding to the next area. Absolutely never let the car dry. Keep wetting it down all the time. On an extremely dirty, average-size car, I will use 4 to 5 buckets of soap and water. When you have finished, rinse out the bucket and filter. You are now ready to proceed.
Step 4 - Rinsing
Using your hose fitted with your nozzle set at medium stream, start with the top and work down rinsing all the dirt and soap off.
Step 5 Second Washing
Slip your mitts on your hands. They should fit like a glove. Rinse and rub the sponge/mitt regularly on the insert in your Dirtguard. You don't want dirt to accumulate on the mitt and scratch the paint.
Step 6 - Final Rinse
Using your hose fitted with no nozzle, free flow the water over the vehicle starting with the top, and it will practically dry itself. The effect of a stream from the hose causes the water to sheet off; using a nozzle causes the water to bead, leaving more water on the surface. Do a test both ways, and you will see the difference: simply amazing!
Step 7 - Drying
Immediately after washing the vehicle, open and close all doors, the trunk, and other parts of the car with locks several times before parking it (this will eliminate water freezing in locks in extreme cold). Drying is also one of the reasons you end up with swirls if you don't do it correctly.
Use a synthetic chamois. Lay the chamois on a panel and pull water away. I find natural chamois dry out, and the smell is appalling.
Use a leaf blower to blow water from the cowling, mirrors, grills, lights, power antenna, and any accessories that hold water. Open all doors and hatches. Thoroughly blow around the inside of the door and trunk.
Periodically apply a good silicone spray to all weather stripping during freezing weather.
Lastly use a waffle-weave microfiber towel to dry any remaining water. I like to use a clean dry microfiber towel and wipe down with a spray wax like Meguiar's to give me that just waxed shine. I can perform this wash in about an hour for an average-size car; you should be able to get this project done in an hour to an hour and a half.
Jim Pyatt at jjimpyatt@aol.com
![]()
![]()
![]()
![]()
![]()
![]()
|
Members Only
|
|
|
|
AMGBA Privacy Policy | AMGBA Website Terms of Use © 1997-2019 All
Rights Reserved - American MGB Association. |
|
Members Only
|
|