One of the more problematic areas for MGTD owners is in fitting the bonnet. The procedure is actually quite straight forward but must be followed precisely. This page will provide you with step by step instructions on how to achieve a tight fitting bonnet.
The bonnet (or hood in American lingo) covers the engine compartment on the MGTD. It spans the distance from the cowl to the radiator. If done correctly the fit of the bonnet should be very tight with no more than 1/8 of gap between the rubber strip on the cowl and/or the radiator shell. If your bonnet does not fit correctly there is either an installation problem or your car has been damaged. In almost all cases its the former. If you follow these instructions you should be able to achieve a satisfactory and tight fit of your bonnet.
|
Begin by removing the bonnet from the car. To do that easily you will need two persons. Unlatch the bonnet on one side. Lift up one side panel and lay the panel in the horizontally open position. Using a drift tap the hinge rod out of the bonnet hinge between the top and side panels towards the front until you can grasp the rod with a pair of pliers. You may need a bit of light oil on the hinge to help it slide easily. One person needs to hold the side panel while the other extracts the rod. Remove the side panel and set it aside. Repeat for the other side. |
|
To remove the top panels open one panel and remove the woodscrew at the cowl and the machine screw and special nut at the radiator shell. Repeat for the other side. Slip the inner and outer hinge supports off of the hinge at both ends. You can now fold both panels together and lift them off of the car as a unit. To remove the hinge between the panels fold the two panels together and slide the center hinge off. |
|
Loosen the bonnet latch capture plates (4 of them) on the front wings (fenders). They should be hand tight so they can be adjusted if necessary. You will note that the two holes are elongated (one horizontally and one vertically). The bolts are inside the fenders and the forward nuts are a bit difficult to get to as they are in a tight gap within the front wings. |
|
Look under the radiator at its support bracket. It is important that it is installed in the correct orientation. The small lip that the crank handle passes through is towards the front of the car. If this is wrong you will have to remove the radiator and turn the bracket around. The mounting bracket fits under the top of the frame and the bolts come up from the bottom. |
|
Inspect the rubber on the cowl. It should be intact and pushed up tightly to the cowl. It is fastened by blued #18 x 3/4" wire nails (36 nails) every few inches. Note that the center is cut out (leaving the lip on the cowl) to accommodate the rear hinge supports. The rear hinge supports do not sit on top of the rubber. Also inspect the wood frame. The woodscrews for the hinge supports should fit snuggly. If they were loose when you removed them, then you will need to drill out the holes and insert and glue in hardwood dowels, cut flush and re-drill the holes to the correct size for the woodscrews.
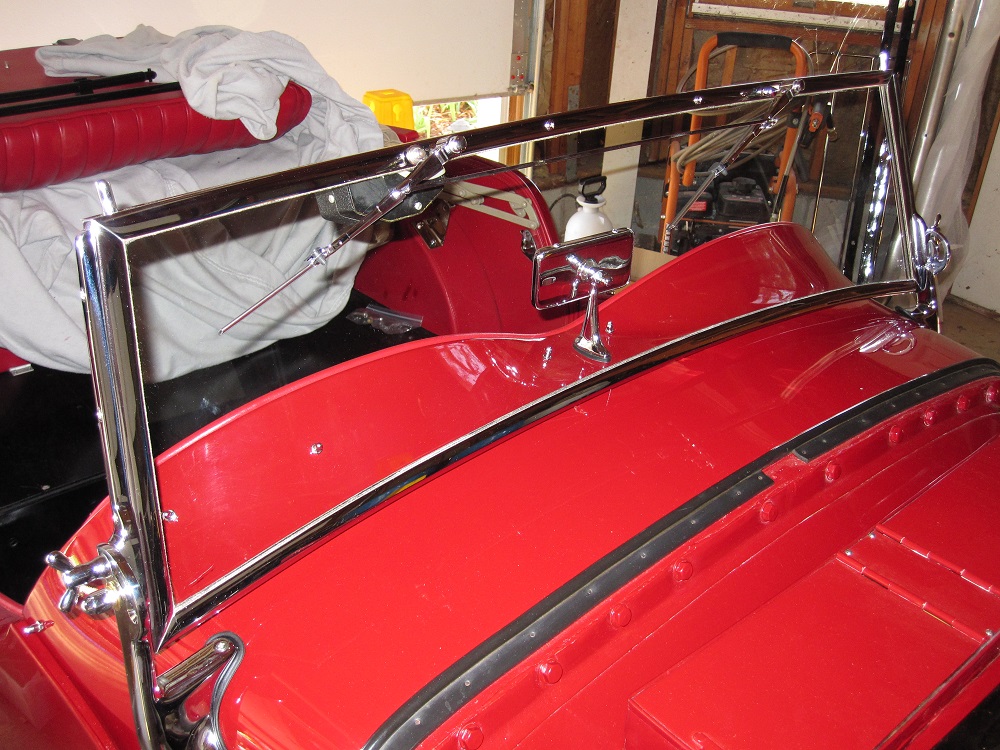
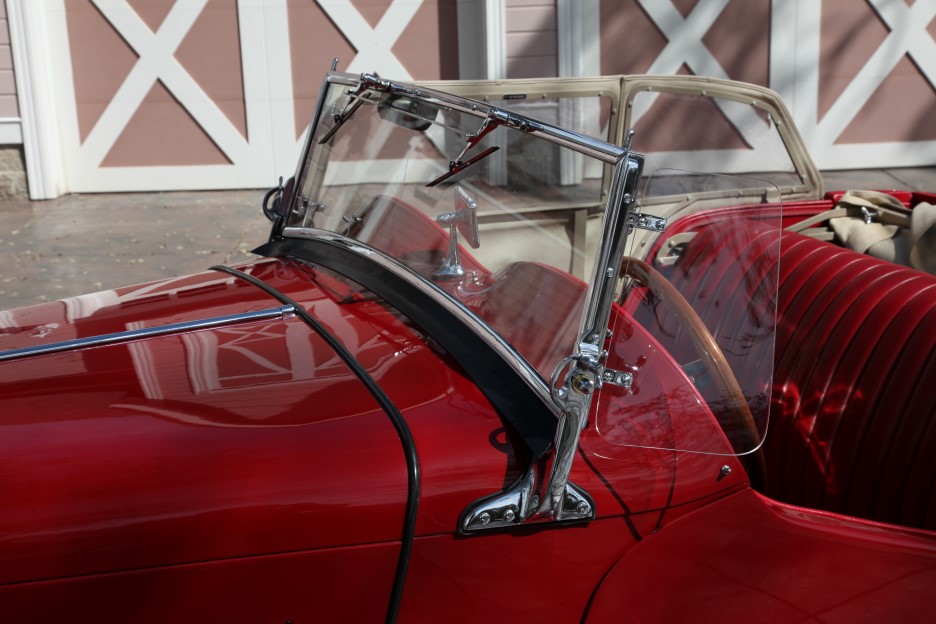
If you need to replace the rubber cowl strip you should consider doing this with help. It must be done with the rubber strip in tension and pressed up tightly to the lip of the cowl. The round part of the rubber rests on the cowl while its notched back sits up against the lip. It will take two sets of hands to get this positioning, especially at the corners of the cowl. You need to work from the center out and downwards, tacking as you go. One person holds tension and position while the other aligns and tacks every few inches. Make sure you don't let the rubber leave the lip or else you will have a wavy line to the cowl strip. |
|
Inspect the radiator shell. The radiator shell is held in place by a set of flat headed machine screws, nuts and lock washers. There are three sets on each side and two on the top. Make sure all the machine screws are in place and tightened down flush with the radiator shell.
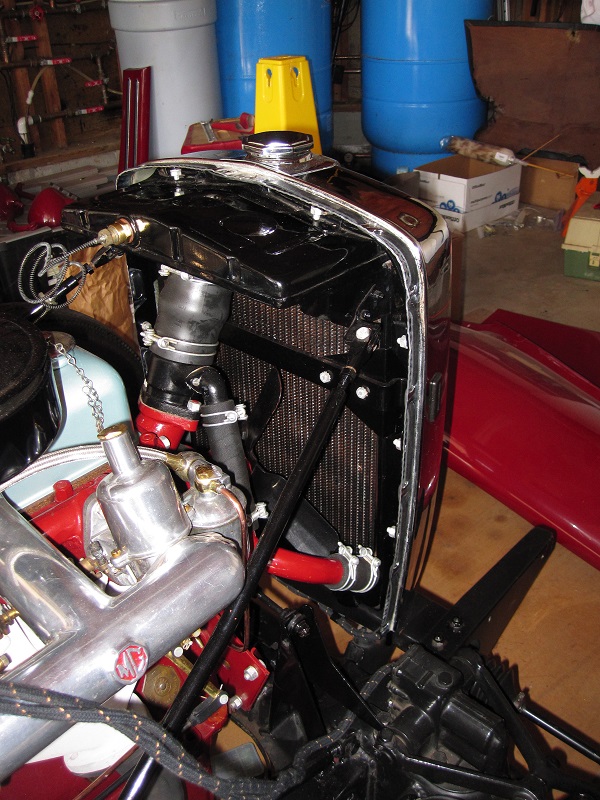
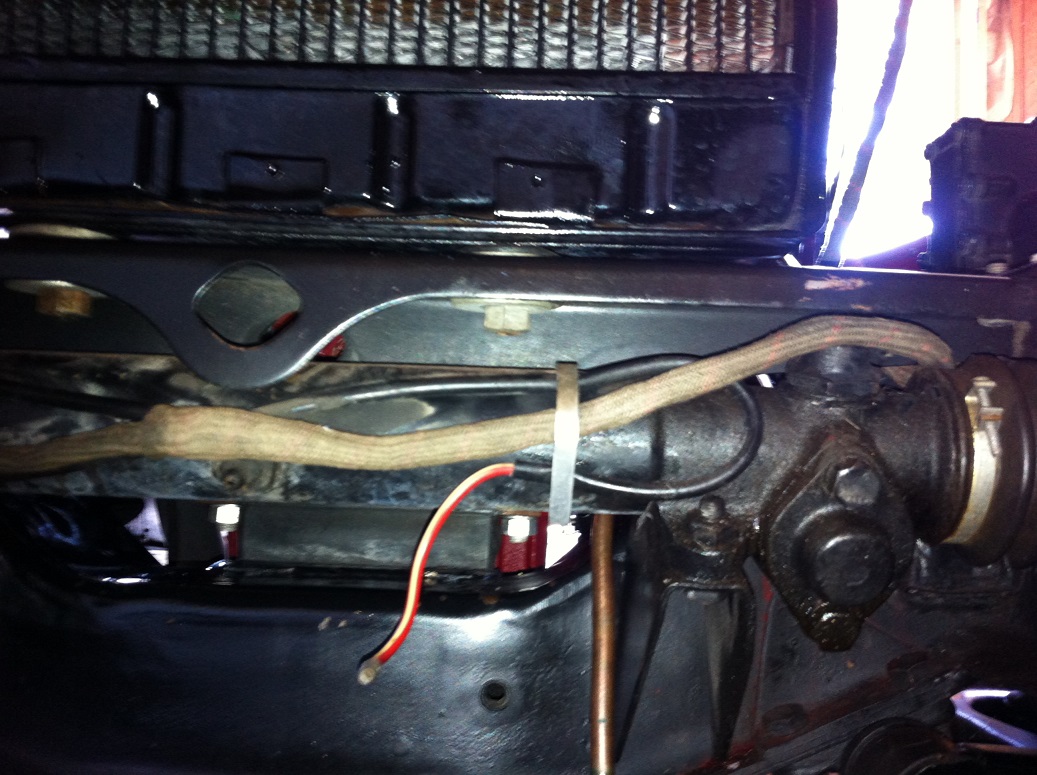
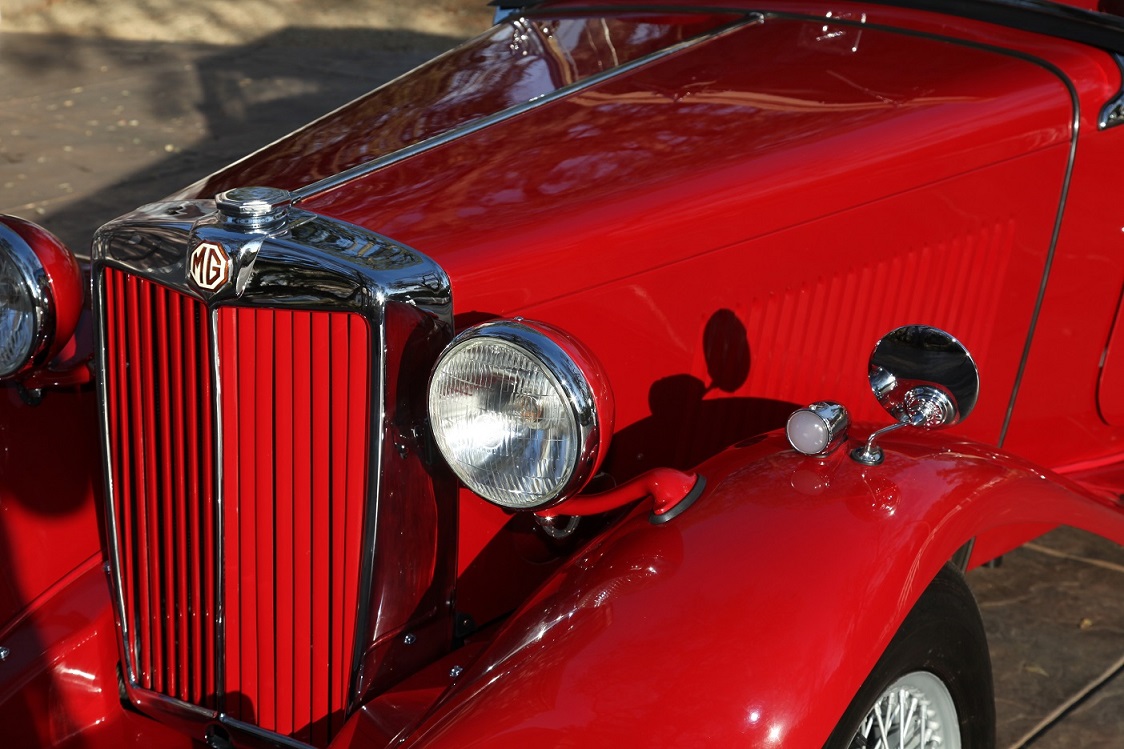
Inspect the rubber radiator webbing. It laces around the shell as shown in the picture. The original rubber webbing is 1/16" thick and 1/2" wide. A better fit will be accomplished if you use that size webbing but a reasonable fit can be made with the thicker 1/8" webbing often supplied today. |
|
Replace the top bonnet panels as a set. Do not install the side panels at this time. Make sure you first place down the inner bonnet support at both the cowl and radiator and then slip the chrome bonnet clamps over the ends of the chrome center hinge. The chrome center hinge will then be sandwiched between the inner and outer hinge supports.
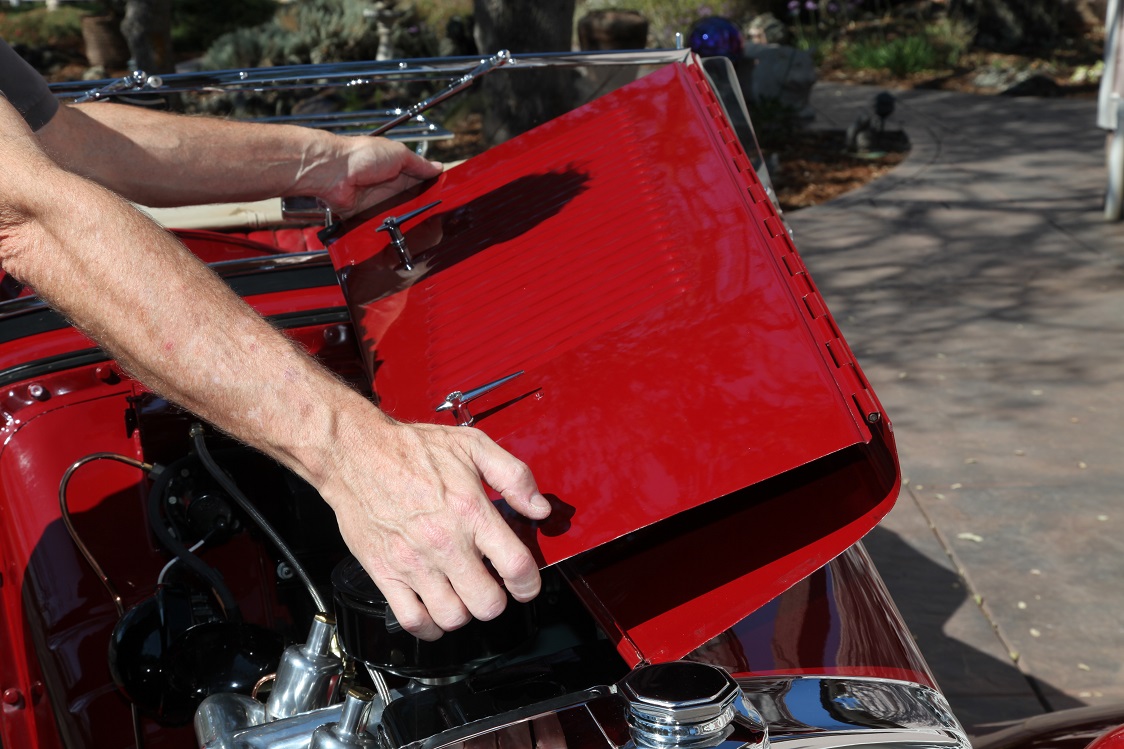
When the bonnet is folded you can slide the panels back and forth. Make sure the panels are slid as far back as you can. They should be pressed up against the rubber lip on the cowl at least at the center. If there are small gaps at the edges or middle we will deal with that later. |
|
If the bonnet panel rests on the radiator shell lip when it is slid all of the way back you will have to remove the two bolts, lock washers and nuts from the radiator stays at the radiator and slide the stays off of their attachment brackets. This will allow the radiator to be tilted forward. You will need 1/8" of gap at the junction of the radiator shell lip and bonnet top panels.
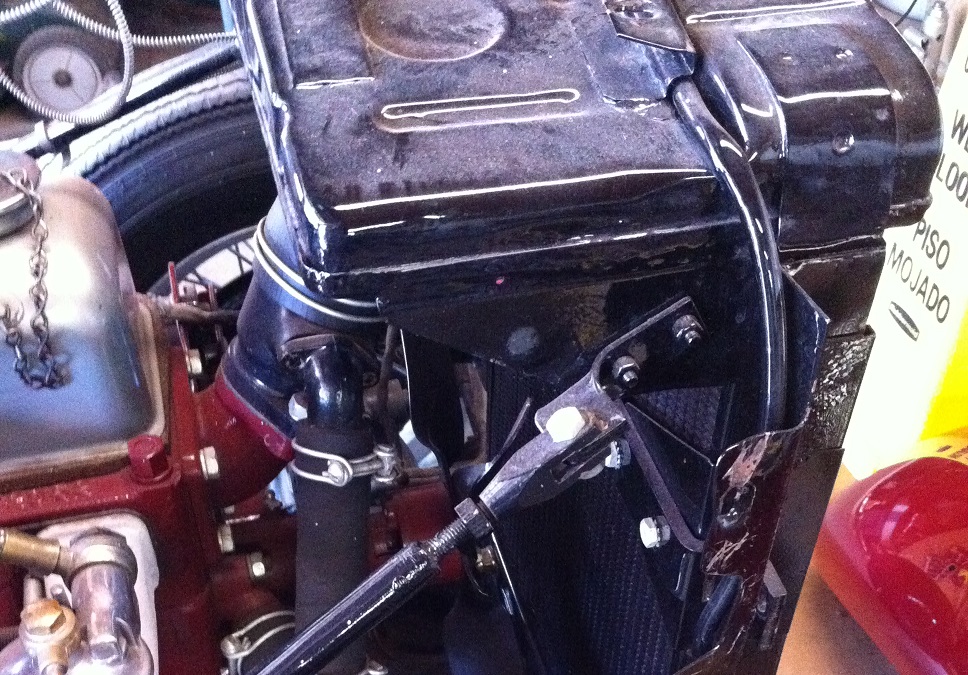
Back off the lock nuts on the radiator stay tubes and rotate the clamping arms in/out until the holes line up when the stays are replaced. You will have to coordinate both sides until you have a uniform 1/8" wide gap across the top. Replace the bolts, nuts and lock washers on the radiator stays after your adjustment and tighten the stay locking nuts against the clamping arms. |
|
Reinstall the two wood screws at the cowl and the two machine screws and special nuts at the radiator shell top to hold the bonnet supports in place firmly. If everything is correct you should be able to open the bonnet panel on either side and rest it on the opposite side.
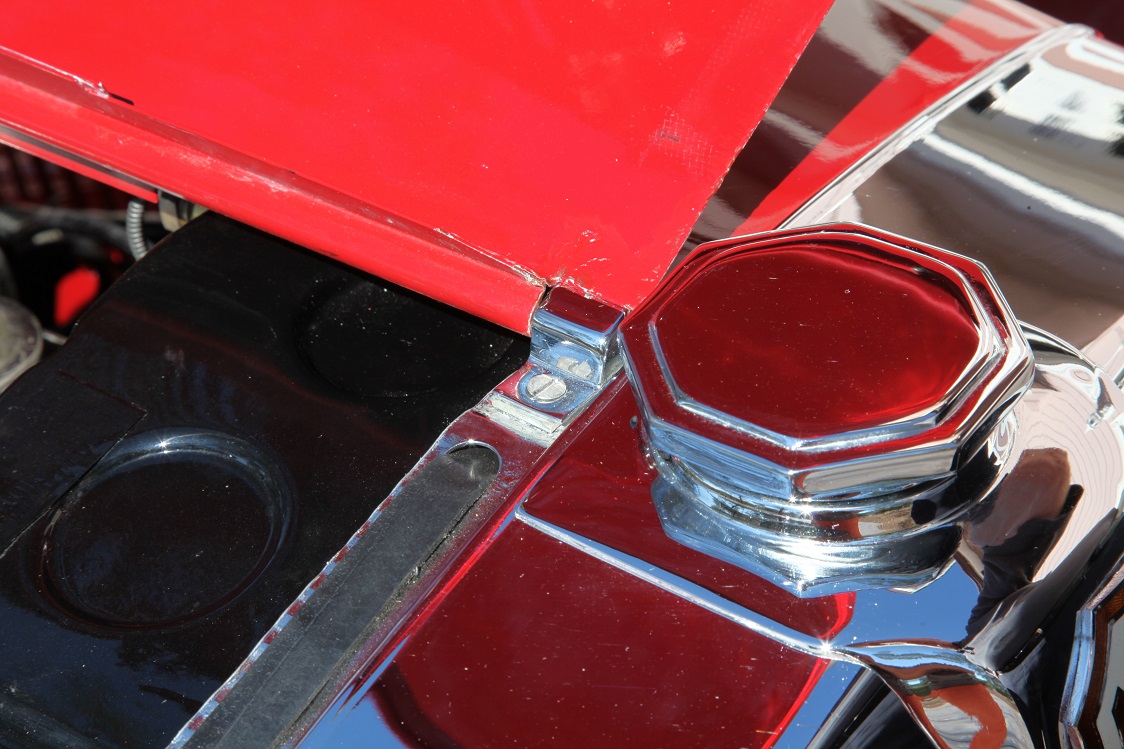
The bonnet panel should stay suspended over the other panel. If the two panels touch then you have not followed the above instructions correctly and you will need to review where you went wrong. The panels, when folded up should have a good six to eight inches or more of space on the far side from the center hinge. (see the pictures) |
|
Now reinstall the side panels, one at a time. You will need two persons for this. Start by folding the bonnet top open on one side. Then one person will hold the side panel against the bonnet top while the other person lines up the hinge tabs. Once the hinge tabs are lined up the second person will carefully thread the hinge rod through both panels. It is best if you apply some light oil to the hinge rod. Replace the rod from the front of the car and push it all the way in until is is hidden at the front. Inspect the rear to make sure the hinge rod is still hidden. |
|
Now carefully close the bonnet being careful not to scratch the headlamps. Inspect that the rear of the panel rests against the rubber cowl strip with little or no gap and that there is an 1/8" or less gap at the radiator shell lip. If you need to adjust the bonnet from front to back open it all the way on on side and slide it backward or forward until you can clear the rear cowl rubber. If need be you can make a minor adjustment to either radiator stay at this time.
Note: Often the side panels will fit a bit tighter than the top panels and may have little or no gap while the top has 1/8" of gap. |
|
Try and latch the bonnet. Remember you might have to press the panel into the car while turning the latch. You should feel the latch catch as you turn it. Test by trying to pull the latch handle away from the car. If the panel pulls away try to re-latch it.
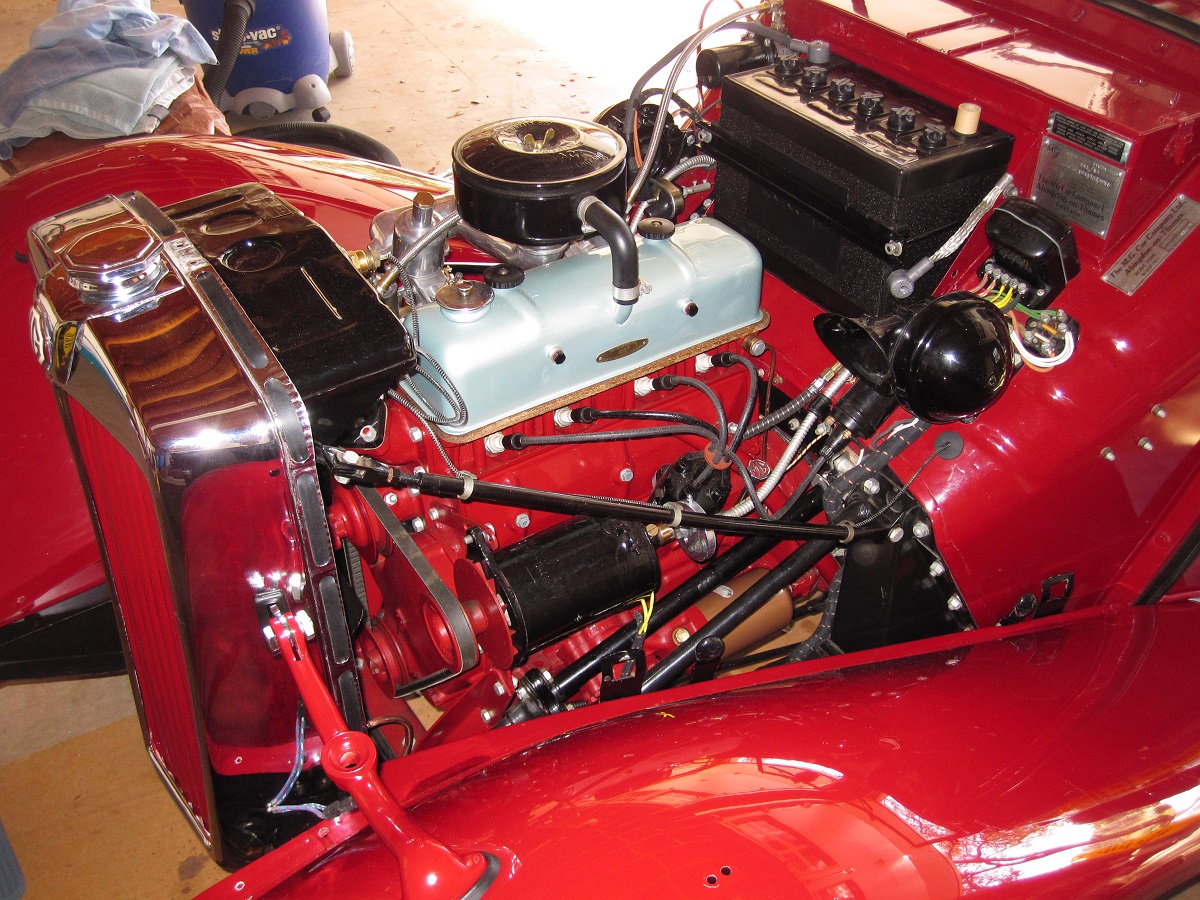
If the panel will not latch you will have to visualize why and then adjust the bonnet latch brackets accordingly. Using a flashlight peer through the louvers to see where the bonnet latch is in relationship to the latch receivers. They should be in the center and with the latch fully open the hook should just be below the top of the receiver cutout.
If the bonnet receivers are not positioned correctly, open the bonnet panel and then pull/rotate the latch receivers until they are centered correctly. Retry the latching until it catches firmly. Repeat this procedure on the other side. |
|
Lastly if you want a perfectly flush rear rubber flange, you can remove the brads in any areas that don't fit tight with the bonnet and slightly move the rubber towards the bonnet. Do this in as large an area that needs this attention and not one brad at a time. Also make sure that the bonnet was as far back as it could go before you take up any gap in other areas. You should not have to move the rubber more than 1/8" if the rubber was mounted correctly to begin with. Some installers purposely leave a number of brads out initially and plan on small shifts during this last phase to install the remaining brads.
Once the latch receivers are correct and the bonnet latches correctly, tighten the two nuts and bolts at each latch receiver. Your bonnet should now fit correctly. |