What did we do ? (during lockdown)
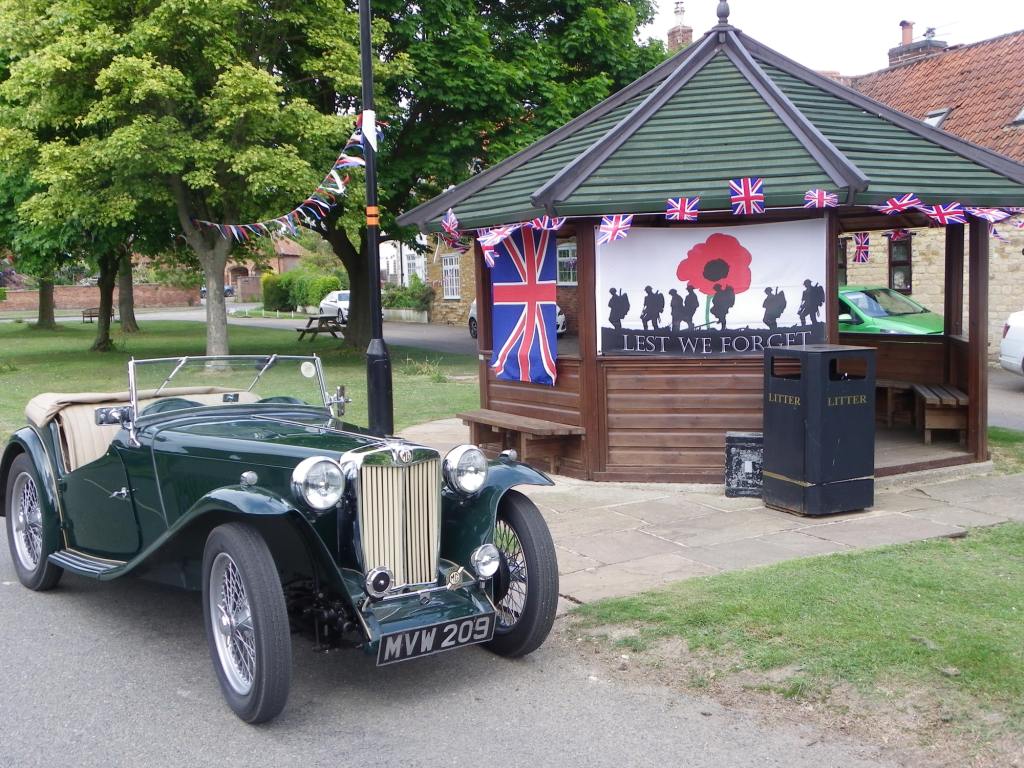
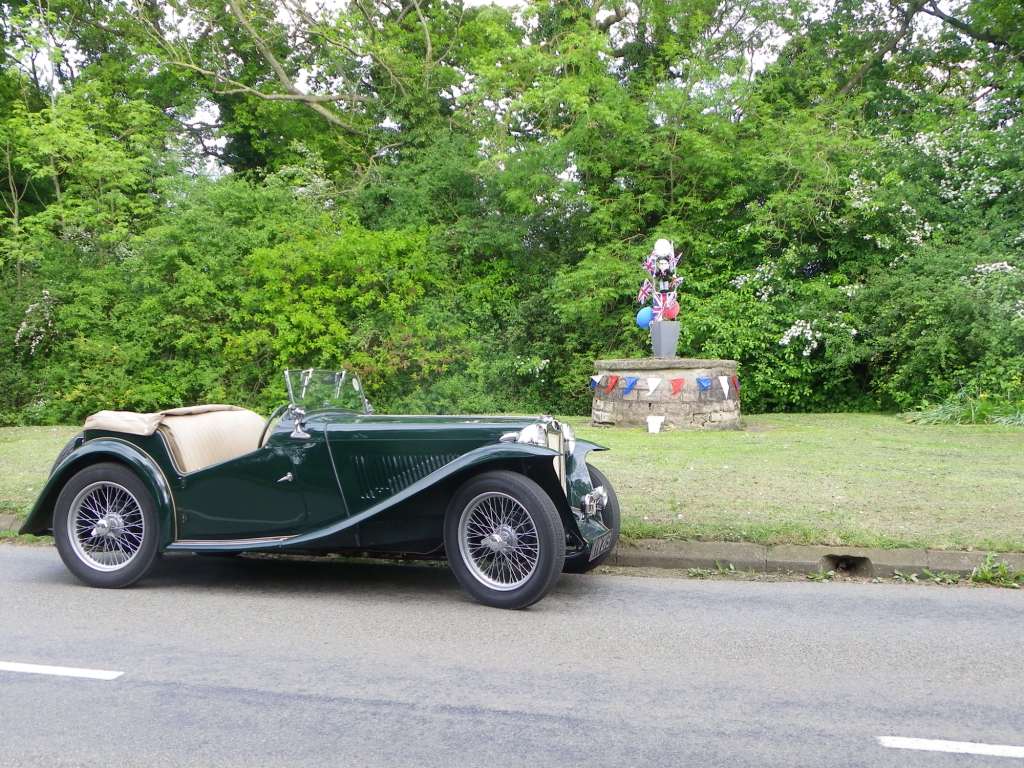
Richard Withington (Allington)
Richard celebrated VE Day in his home village
|
|
|
*****************************************
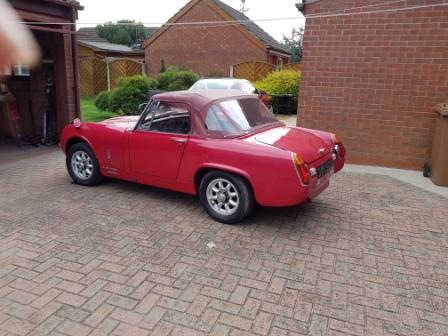
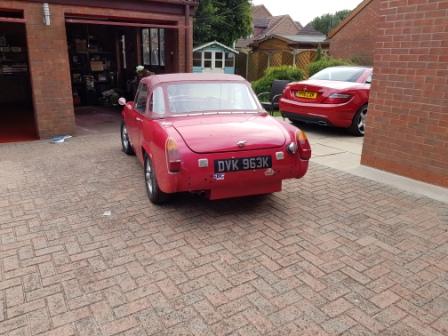
Bob Welch
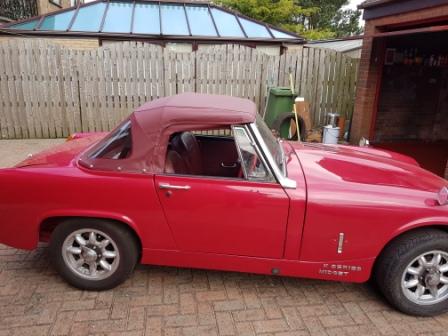
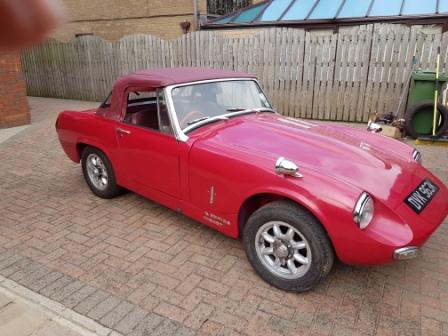
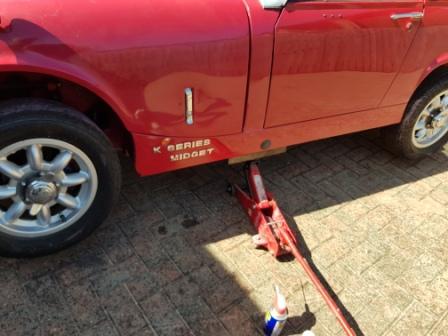
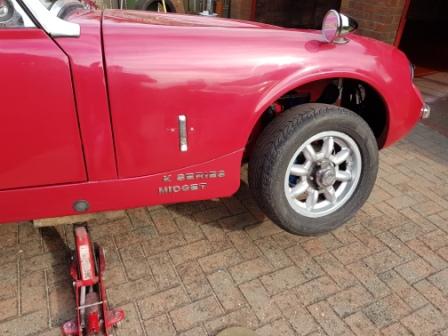
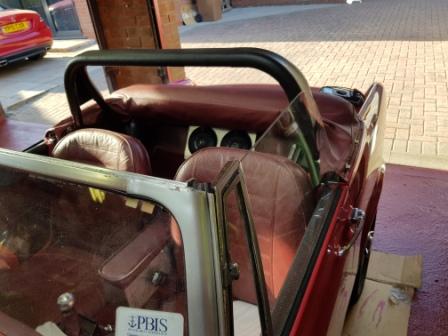
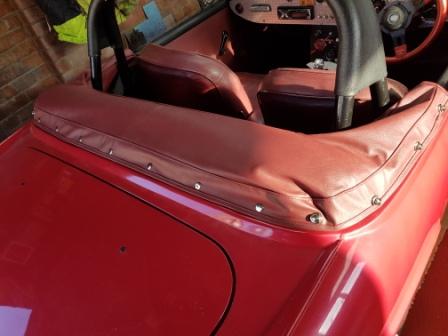
Well like many people I was trying to keep busy. I have stone chipped my sills and colour painted them. I then relettered them with chrome letters sourced on a popular internet auction site :) Finally I have fitted my new hood as the temperature warmed up along with a new hood bag. Pretty happy as it all worked out. Note the final photo shows why I had to do the badging. Fitting the hood was fairly easy but I could do better next time as with most things
 |
 |
 |
 |
 |
 |
 |
 |
 |
*****************************************
 In Lockdown – Malcolm Clark
During The 2017 engine rebuild I uprated the clutch diameter, requiring change from the original carbon release bearing to the modern roller type – that’s where the trouble started.
MG Live that year the last run at the California Cup event was completed not knowing where in its travel the clutch pedal would effect a release – made little difference it was going to have a gear change come what may – Mr Toyota builds a very strong gearbox.
Engine out the next week found the standard Midget release arm pivot bearing had departed, resulting in a floppy arm hence the random action.
New parts fitted but the action still not 100% - detailed head scratching – trial and error with slave cylinder push rod lengths made no difference -
This is a Toyota T50 5 speed gearbox fitted in the Midget – a conversion I pioneered in Autotesting back in the early 1990’s when in National championship events we were consuming three Midget boxes a year over 15 events. So after an eventful trip over to Dublin, for their International event, found no first gear after 20 seconds of test 1 - exit Midget boxes income Toyota - put this conversion in a normal road going car clutch clearance not an issue – ask it to change gear forward / reverse going whilst going sideways at 20mph plus speed defeats technology employed – with the standard Midget box teeth would fall off. With the Toyota the original carbon clutch release was OK but the smaller diameter clutch plate overheated and would lack bite as the day progressed or even breaking up if you got really excited. – but very hard to break the box.
Anyhow back to 2019 - realisation part of the issue required a bigger master cylinder to allow quicker movement of the slave, meaning the pedal did not run out of travel on the bulkhead – excess travel easily controlled with a stop under the pedal.
 |
Now Mr MG only made one size master cylinder and compounded the problem by offsetting the mounting eyes, to the rest of the world – many had been before me meaning the solution lay with the twin master cylinder brake conversions brigade and spacing the new clutch cylinder back from the brake cylinder and having a remote reservoir solved the problem. That done and winter upon us, installing a later type Toyota T50 gearbox was the project – upon removing the present box I found the roller release bearing had been rubbing on the gearbox input shaft - not a problem with the normal carbon bearing but caused by the heavier roller bearing. |
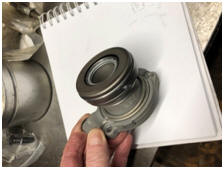 |
What the roller really needed was a tube over the gearbox shaft, for the bearing to run along - that would require a mounting point inside the bell housing – so if we go to those lengths why not change altogether to a modern concentric release bearing – does away with the Midget slave cylinder (a product which has bought many a Midget owner to tears). Trip to the friendly Motor factor and a suitable part from a Nova is purchased |
Next design a mounting which preloads the bearing back on itself enough so that when the pedal movement pushes forward it moves the clutch cover fingers enough to give clearance but also allows for the clutch cover fingers to move outwards as the plate wears – simples!!! Ha ha
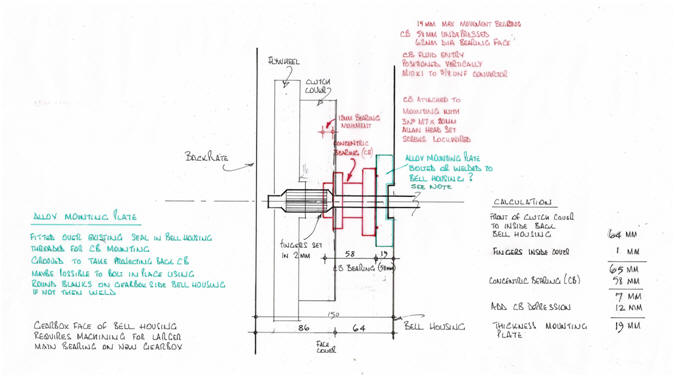
Needed a machine shop anyway as the later Toyota box has a larger front bearing, meaning enlarging the cut out in the bell housing – so they could have the job of making the mounting and its fixing.
Chairman Hall’s empire looked to me like the sort of establishment well used to idiots like me, landing with off the wall ideas such as this, so off for coffee at Morton.
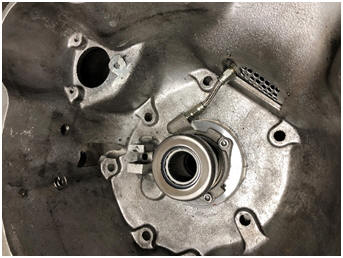
Sure, enough a rapid turnaround had the parts installed in the Bell housing
But then Covid 19 arrived - well put it all back together - plumb the new hydraulics and from the feel of the pressure something is moving so looking positive – but the fat lady not singing yet
The new later Toyota box takes
a different splined yoke, meaning revision to the Prop shaft – the Prop shaft
man still in Covid isolation, so job grinds to a halt.
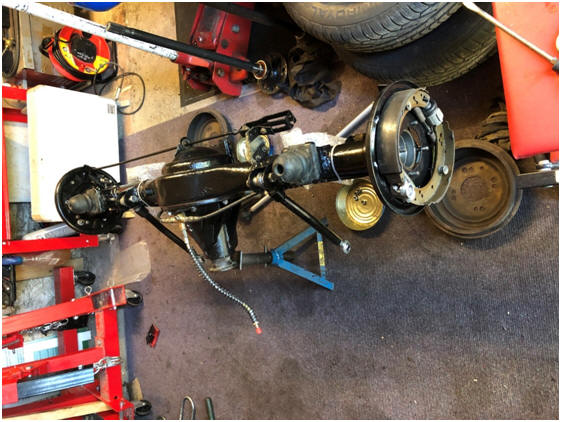
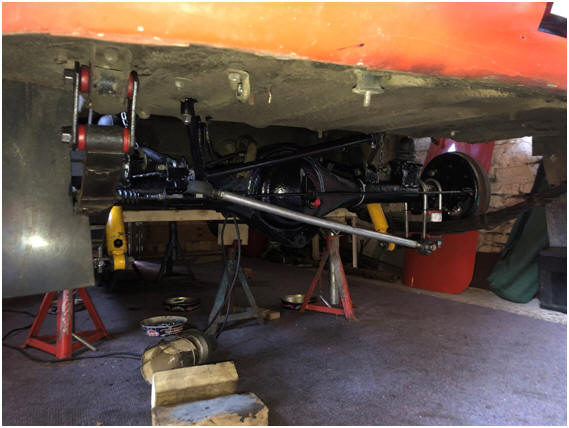
Attention therefore turns to rest of the car – been nearly ten years now since I first built it and apart for repairs the front and rear suspension never been stripped, fully checked, cleaned and re shimmed.
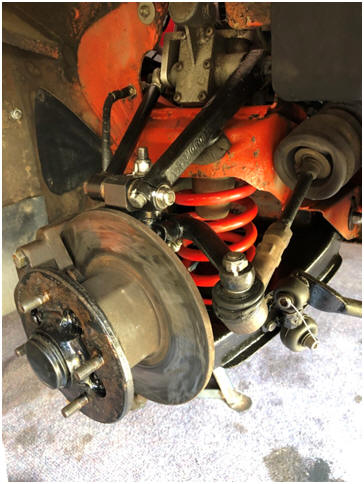
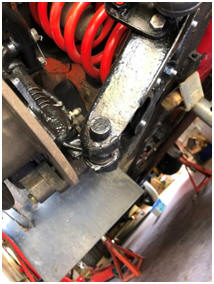
Front first – Midget trunnions always seem to work better after a good clean out and new grease – good check around the outer wishbone joint where we have experienced cracking in the past, but the modifications of plating underneath seemed to still be working (see picture below) – clean up the calliper pistons – no point in wasting horsepower turning wheels held back by dragging brakes – fractional extra return of the piston makes big difference.
Rear on this car is a bit special – Ford Anglia slippy diff axle (stronger half shafts) – rose jointed Panhard rod (stops sideways movement of axle ) – vertical telescopic shocks and rose joint locating bars from top of axle to Bulkhead (stops any tramping) – lower blocks – Brake cylinders stripped and cleaned – only year old and already showing signs of the internal oxidation as only the modern ones seem able – so whole lot stripped, checked, cleaned painted and rebuilt.
 |
 |
What’s next - well these two are waiting – had hoped to pull in a few British Championship rounds with the Stryker in 2020 – but that’s not to be – so the multitude of suspension joints will enjoy being cleaned and re greased – three aluminium brake master cylinders will not like sitting about so strip and clean.
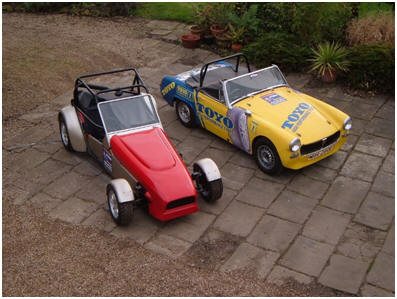
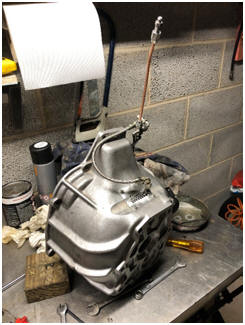
The Toyo Midget not been used since 2005 – the engine / box and rear end were used in the build of the Orange midget above – the Toyo Midget is due a reincarnation into the evolution of all or part of one of the 60’s aluminium bodied racing creation Midget / Sprites but as a road car – so strip the bare shell first job
*****************************************
In Lockdown – David Stonehouse
So what did you do to your MGs during lockdown David Stonehouse
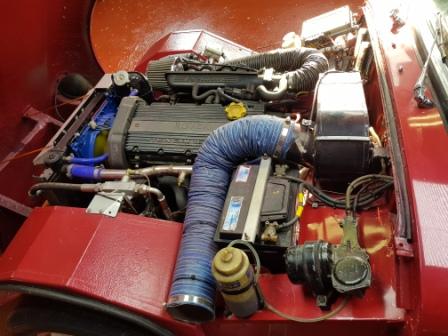
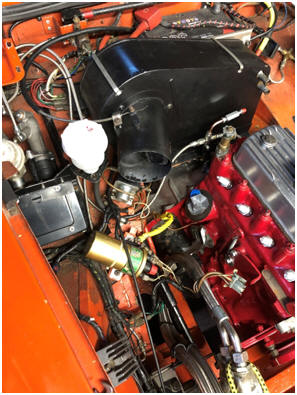
My V8’s engine was looking a bit scruffy as some of the ancillary equipment needed a bit of refurbishment. The rocker covers had started to chip having been removed and refitted numerous times during my thirty year ownership so I decided to have these powder coated in gloss black. I mentioned to the technician that the fins of the rocker covers needed to be exposed and that I intended to sand through the finished powder coat to expose the bare metal underneath. He urged me not to do so as he had never encountered this technique and that it would make the powder coating crack and split. However, I consulted with Peter Hermite who had successfully undertaken this process on his MGB rocker covers.
Eventually, the newly powder coated rocker covers arrived back at my home and I clamped each in a very secure holding. Then with a variety of different grades of wet & dry I carefully rubbed through the powder coating to expose the bare metal fins beneath. I had to take extreme care where the fins were rounded on the edges of the covers so as not to remove too much metal but after some hours I was happy with the results. I took the covers back to the powder coating technician who took photos for his website. The company I used is called Giraffe Techs of Burgh le Marsh, near Skegness tel: 01754 890058. They also refurbish alloy wheels at a reasonable price of £40 a wheel.
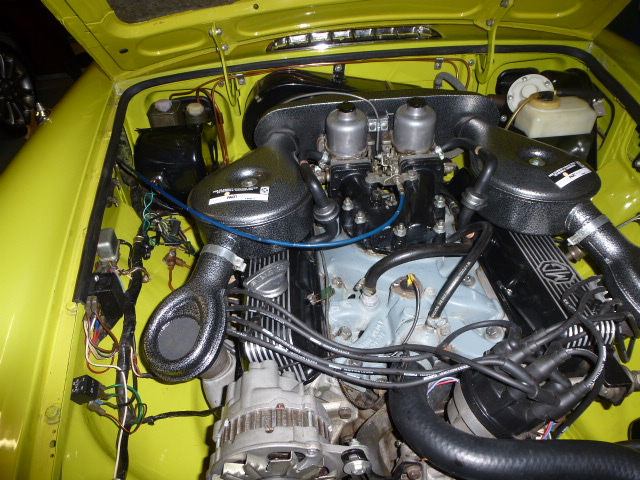 |
Having been satisfied with the rocker covers I then turned my attention to the air filters and air box – which when taken apart consist of 7 different sections. The technician convinced me that instead of factory grey/silver it would be different to powder coat these using a dual colour scheme which gives a mottled grey appearance. I was pleased with this result and started to assemble the components before refitting to the car. I fitted new labels, I received from Brown & Gammons, but maybe should have waited until the components had been re-fitted to the car as one label is not quite properly aligned so will have to be replaced at some point. photos for his website. The company I used is called Giraffe Techs of Burgh le Marsh, near Skegness tel: 01754 890058. They also refurbish alloy wheels at a reasonable price of £40 a wheel. |
My TF is now 17 years old and was showing some signs of age in the vulnerable parts underneath the rear wings and subframes. Both rear wheels were removed to gain access to the underneath of the vehicle. I spent several hours cleaning the dirt, dust and accumulated muck from the underneath so that I could apply liberal coats of waxoyl on the subframe, rear wings and sills. A dirty job but it got rid of some old clothes too! I then treated the upper paintwork to a clay bar exfoliation followed by 2 coats of autoglyn wax based polish.
I just love driving the TF and have the roof down as much as possible as it always guarantees a huge smile on my face. Thankfully, the weather during lockdown has been exceptionally warm so I have been driving it as often as possible. My now tanned complexion makes others believe that I have spent lockdown abroad!
*****************************************
Improving the Breed. Keith Robinson
I have spoken in the pass of my affection for our MGTF, and my opinion has not changed.
However, as with all thing in life, nothing is perfect and this does include the TF.
As any TF owner will tell you, routine servicing on the power train is not the easiest task. One constant “issue” from my perspective is the need to remove the engine cover in order to gain access. Lately it has become my mission (?!!? - I need to get a life!) to reduce the need to do this as much as possible. So, what have I been up to and has it been successful? Read on.
Routine oil and filter changes bugged me from the time we first bought the car. It should be straightforward and it is, until you come to refilling the engine with new oil. Unfortunately it takes decades to refill the engine if you use the top up chamber accessible from the boot area. Quite some time ago I found that it is (just!) possible to remove the screwed cap on the cam box from the engine access in the boot area. This is made easier if you have skeletal fingers like myself. Care needs to be taken or the cap could disappear into the black hole of the engine compartment, never to be seen again. With cap removed you now need a small electric hand drill and a small gear pump for moving fluids (mine came from Machine Mart). All that remains is to connect the pump and oil can with a length of suitable size hose and connect a small length of copper water pipe with a 90 bend in it to the pump outlet, again using suitable hose. Couple it all together and you can then empty the required quantity of oil from the can into the engine (or the engine bay and hence floor if you are unlucky!) in double quick time. At this stage make sure the drill is running in the correct rotation for your pump otherwise you will pump air out of the engine until hell freezes over! Last step it to screw the oil cap back on the cam cover, probably made easier if your arthritic fingers have not seized up after cleaning up all the oil from around the engine bay and garage floor.
Trust me, it can be done without BP sized oil spills.
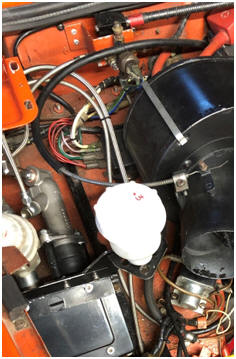
The next niggle I have had for ages is the hassle involved when bleeding the clutch or changing the clutch hydraulic fluid. Again, what should be a simple process is confounded by lack of access to the slave cylinder bleed screw. In their infinite wisdom, MG design engineers placed this bleed screw such that access cannot be achieved without removing that pesky engine cover. And guess what, the Chinese engineers did exactly the same thing!! Something needed to be done.
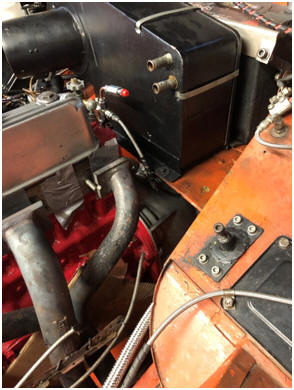
My answer was to obtain a length a braided steel hole with a connection into the slave cylinder bleed port at one end and another bleed screw block and nipple at the other. I was lucky, I managed to source a ready made hose, 23” long, from MG Mania but I am informed it was their last one. However it is perfectly possible to purchase the required components separately and make your own hose. My hose terminate at the left rear area of the engine compartment, above the fuel filter (see picture) and means the clutch hydraulics can be changed/bled with ease. Job done.
The two remaining routine servicing task normally required on the engine are air and fuel filter changes. The air filter is simple, replace the standard filter element with an after market fabric one. I used a Pipercross element that only need cleaning once every millennium so ....sorted.
The fuel filter is still work in progress but I suspect it can be replaced from the engine access point within the boot. However (that word again) this might involve loss of considerable quantities of skin and a possible visit to A&E after a spanner ricochets off the garage wall and cuffs you on the head in a bout of profound frustration! You have been warned.
So, routine servicing is now a much simpler task requiring considerably less time. I only wish I had done these modification 10 years ago.
Whilst I am in full flow I must relate one other pet niggle of mine regarding our TF. As you will know our car is an MG motors vehicle often referred to as “the Chinese copy” (Thank you John)
As such it has a low level alarm on the coolant header tank as a factory fit. Having never had the alarm operate (thank goodness) I began to wonder it it did indeed work and decided to test it. I removed the header tank cap and, with the ignition on, pushed the level float to the bottom of the tank. Result....nothing. I immediately suspected the float was faulty. How wrong could I be!
After much testing and research it transpires that the level float was functional but the reason my tests failed is that the MG engineers had, in their infinite wisdom, put a 40 second delay in the circuit! Plenty of time for your engine to go Pop if cruising at 70 on the motorway. On top of that the alarm was a simple, unobtrusive warning light on the dash, with NO audible alarm.
I suspect this was because this circuit is controlled through the ECU and does not involve voltages sufficient to drive a sounder. Given the importance of cooling to a K series engine I find this amazing and unacceptable. Things must be done.
However (again) all was not lost. Recently I read an article in a motoring journal of a modification
designed for early F and TF owners showing how to retrofit a new coolant header tank and instal a low level alarm light AND sounder with a variable delay in the circuit. In summary what is needed is the latest type coolant header tank with the level float (I already had that); a 12 volt time delay relay; 12 volt warning light; 12 volt alarm sounder; sundry electrical connectors and lengths of 2 core cable.
I now have a coolant header tank low level alarm that brings on a bright red flashing light above the speedo and a buzzer that is located next to my right ear with a time delay of 8 seconds.
So, another “issue” addressed.
My only worry now is that, whilst I will not miss a low coolant level warning in the future, I may suffer from a heart attack when the alarm goes off in my right lug hole!
If anyone need more information on any of the above please feel free to contact me, assuming I have not been admitted to hospital.
All the best and stay safe,
Keith Robinson.
*****************************************