The following tips and techniques are ones that I have used over the years
to restore my car and to keep it in as new a condition as I can. Although
my car was restored in 1975 it still looks very new today. Mostly because
it has not been driven more that about 20,000 miles since then, but also
because of the following techniques that I have utilized over the years.
You may find some or all of these useful to you as well.
Here is how I clean and polish my car. My car is painted in lacquer and
you may have to adjust this procedure for enamel a bit. First ensure
that the car is clean by either washing with water and a mild soap (car
shampoo) or wiping with a damp cloth. Next go over any fine scratches
with a mild rubbing compound or a car cleaner type wax. The next step I
only do yearly or when needed.
Once a year I wax my car with a mild cleaner wax such as Meguiar's
Cleaner Wax. This is a cream wax in a dark red squeeze bottle. When you
use it you will witness a small amount of your paint come up with the
polish as it has a very mild rubbing compound in it. It also leaves a
terrible amount of wax residue in crevices that you will have to pick
out with a tooth brush. This is why I don't use it very often.
Next you will wax the paint once more (and more frequently with this
step) with a mild oil/silicone based polish such as Turtle Wax Minute
Wax or Liquid Ebony liquid waxes. In my climate there are three things
that ruin the paint; sun, dryness and ozone. Keeping your car garaged or
covered when not in use will help with the sun. An oily/silicone type of
car polish will help with the dryness and ozone. Paste waxes are good
for chrome and the yearly cleaning, otherwise I use oil based polishes
such as the Minute Wax. These waxes also do not leave a residue like the
paste waxes do so cleanup is much easier.
After the oil/silicone based polishing, treat the rubber goods with a
product such as Armorall. Follow-up with a vinyl and/or leather
treatment for the interior and lastly clean the glass with a glass
cleaner such as Windex.
Polishing Engine and Chassis
To clean the engine, wheels, chassis and other hard to polish spots I
use a spray on furniture polish such as Lemon Pledge. Use liberally and
wipe up the excess and buff with a soft cotton cloth. This type of
treatment not only cleans up small amounts of oily dirt, it also shines
and protects these finishes. This would be impossible to do with car
wax.
Protecting the Wire Harness During Waxing
You must protect your wire harness during waxing otherwise the wax
residue will embed itself into the cloth covering and you will not be
able to remove it. On those areas where the wire harness comes in
contact with the body parts, pre wrap these in masking tape before
applying the wax.
Cleaning Tonneau, Hood and Side Curtains
To clean the hood, tonneau and side curtains I use Woolite. Woolite is a
mild cleaning solution for knits and other delicate items. It works well
with the outside softgoods on your TD used with a stiff brush and lots
of clean rinse water. Dry the items in place to keep their shape.
I will not attempt to explain body work techniques on these pages save a
few recommendations. There are many other sources of body work materials
in circulation. I do want to point out one tip that I think you should
consider in this area though. It is one of the biggest mistakes that
first time restorers and even some professional do when restoring a car.
They dissasemble the car first. First and foremost it is important to
remember that the MGTD, like all cars, is a collection of parts that are
put together (generally bolted together in the case of the MGTD) as one
unit. It is important that you realize this as you approach the
restoration of the car. For this reason you should begin all body work
with the car fully assembled. While all the fenders are in place you
should do your rough body work and straightening. Make sure that all the
parts line up with each other and there are smooth lines from part to
part. You should be able to look down the fender line from front wing to
rear wing and all the parts should be on an even plane. Also make sure
that the radiator and hood line up evenly. Make any adjustments that you
need to do now. Also check the fit of the doors and make sure the hinges
are working properly and are not worn out. Once you have completed the
major body work (less fillers if needed) you can then disassemble the
car and proceed with the finishing of each part individually.
Fitting the Doors
The doors on the MGTD can be a bit of a hassle to get to fit correctly.
First it is assumed that all the body is in sound condition (wood and
metal). Next make sure that the hinges fit snugly and are not worn out
at the pins. You may be able to purchase slightly thicker hinge pins
with the same diameter head if your hinges are worn. Replace any hinges
that need replacing. You will need to remove the door panels and floor
boards for the next step. You will have to experiment with all three of
the following techniques interactively until the doors fit just right.
This may take some time. The doors are adjusted by the following means.
First the hinges determine where the door is placed in the opening.
You may have to bend them slightly in a vice. Wrap them in cloth first
to prevent them from being severely scratched. Next you will need to
adjust the shims under the body where it attaches to the frame. There
should be various pads at these locations. Experiment with different
thicknesses of pads until you have just the correct opening. You may
need to adjust the hinges at the same time. Generally thicker pads in
the middle of the door will make the opening wider while thinner pads
at that location will make the opening smaller. Lastly you can adjust
the strap on the door to change the angle that it closes at.
Optionally you can replace the strap with a cable and
turnbuckle
system that allows for more fine tuning. This will align the top and
bottom so the door fits flush with the body. When done I paint the
door with the hinges on them and then afterwards bolt this assembly to
the body.
Once the doors fit into the door opening correctly, you will need to
make sure the latch mechanism is properly set. This involves making
sure that both latch parts are aligned both in the same plane and also
the lock fist into the latch as far as it can go. This is a time
consuming process that requires shiming of either piece and possibly
using washers on the latch rod to move it in/out of the locking
mechanism. This is a bit too involved to describe Here but you can
find lots of information on the various forums and in the tehnical
section of this website.
Stripping Paint
Once you have decided to strip the paint from your vehicle you have a
number of choices; chemical strippers, tank strippers, and abrasion
strippers (sanding or blasting). I like the chemical method the best all
though it is the most labor intensive. All of the other methods have the
potential to damage the metalwork. Tank strippers do a wonderful job but
they remove all the protective coatings, even where you can't see them.
Also with tank strippers you may not get all the solution
removed/neutralized so you run this risk of further problems down the
road. Only use this method on parts that you have full access to all
sides. Abrasion strippers are effective but can alter or ruin the
underlying metal. Especially sand blasting. I would not recommended it
unless you have severe rust. Plan on following up with a very aggressive
body treatment after sandblasting. Chemical strippers are the most labor
intensive and dangerous, but only work where you want them too. Look for
new environmental friendly chemical strippers and follow the directions
explicitly. You might combine these methods as needed, as each has its
own merits on different parts of the car.
Painting Wire Wheels
One of the harder things to paint on a car is wire wheels. Now if you
have an original MGTD you don't have to worry about wire wheels. Just in
case you have them here is a tip on how to paint them easily. Get a
halfshaft with a wire wheel hub on it. Mount the wheel on the hub and
have one person spin the shaft slowly as the painter with the spray gun
apples the paint. In this manner the paint will be more evenly
distributed on the wheel and you will be less likely to create sags,
runs, or dry spots.
Painting the Radiator
The radiators main purpose is to exchange heat from the engine with the
environment. This is accomplished by air passing over a set of narrow
tubes that are connected by fins of thin copper material. If you put a
heavy coat of paint on these fins you are severely reducing the cooling
effect that is desired. The paint will act as a thermal blanket. One way
to achieve a functional but beautiful radiator is to use different paint
types on the various surfaces of the radiator. First you will need to
have your radiator hot tanked and cored. Make sure to mention you do not
want the radiator painted. For the finned area (core) I would use a
light coat of black heat paint. Do not prime the fins first. This is the
same type of paint used for exhaust systems. After that has dried
overnight mask the area on both sides. Now paint the remaining area with
primer and then follow up with a high gloss black enamel such as Dupont
Imron.
Painting the Engine and Transmission
The engine and transmission of the MGTD is predominantly painted a dark
red color. You may obtain
original color paints from
various parts suppliers or have the paint mixed at an automotive paint
supplier. Generally an automotive paint will produce a superior finish
over the paint supplied in spray cans. One thing to consider though is
the thickness of the paint application. The more paint you apply to the
engine and transmission the less cooling that will take place
convectively. While this is no where as efficient as the heat exchange
of the radiator, it is non the less a source of cooling. Too thick of an
application of paint could reduce this effect. Generally it is best to
limit the amount of paint (especially automotive body paints) that you
apply to the engine and transmission.
Finishing Lacquer Paints
There is no doubt that lacquer can provide the best looking finish. One
of the ways of achieving this is to create a flawless paint job. To do
this with lacquer is fairly easy but it takes a great deal of time and
effort. First you must start with perfect body work. Be prepared to
paint the piece of your car many times if necessary. Get at least one or
two extra gallons of paint over and above what you think it will take.
Apply a number of coats of lacquer (14 to 24) especially on the edges.
After the paint has dried for a few days (weeks is better) take 1200 to
1500 grit wet or dry sand paper and a sanding block and lightly sand the
entire painted surface using water liberally. Use rubber sanding pads
for rounded areas. Everywhere on the surface should now be a uniform,
smooth, dull finish. If you discover dimples or bumps during this
process its back to the bodywork and refinish stages. Now you can polish
the lacquer to a high gloss with a buffer and/or by hand. Do the edges
by hand and don't sand too near these as they are susceptible to paint
loss. I even go as far as applying masking tape to the edges when
polishing these areas by machine in order to preserve the paint. If you
use this sanding technique you will be assured of an amazingly shinny
and mirror like finish.
Plating 'Lift the Dot' Fasteners
Even when using brand new 'Lift the Dot' fasteners I have them plated
first. It is amazing how much better this looks than plain stainless new
ones.
Polishing Brass, White Metal and Aluminum
You can polish all of your unpainted metal parts with a buffing wheel
and then spray a coat of clear gloss over the top of the polished parts.
Look for special cans of paint at the paint/hardware store for this
purpose. Most of the brass, aluminum, and white metal parts look great
with even a little bit of buffing. By coating them afterward the finish
will stay shinny for years. Don't coat items that you can easily polish
such as the air cleaner manifold and carb dashpot bodies.
Restoring Bakelite Finishes
Some Bakelite items cannot be replaced. The problem is that over time
they loose their shinny black look. One way to restore these parts to a
near new condition is to paint them first with a black upholstery dye in
spray form. Do not use the kind of dye that covers up the finish but
actually dyes the finish. Follow-up with a clear acrylic high gloss
coating if needed.
Some readers have also had good experience in restoring bakelite
finishes to like new by polishing them. Use the white colored compound
and a buffing wheel. Be careful around any cast details such as
lettering. Will make the item shine but may not get rid of the brown
look, some of which is inherent in older bakelite. If you want a truly
black look then you will have to follow with the procedure above.
Copper Polishing
The copper fuel lines, overflow pipes, and other copper lines look very
nice polished. I use a product like Brasso to polish these parts. It
only lasts for a few months but once the initial polishing is done, it
is easy to restore the finish. Don't forget to do items such as the
engine ID plate, tappet clearance plate, and radiator drain pipe. If you
have coated any of these items with the clear finish then you cannot use
Brasso on them.
Instrument Panel Knobs
Some of the knobs are bakelite and some are hard rubber. They can be
differentiated in that the hard rubber, when polished has a mottled,
very dark brown appearance. Both respond well to a buffing wheel using a
compound called stainless (white). This buffing removes all of the
oxidized material from the surface and restores the original gloss. Some
have then painted the hard rubber knobs with a special paint such as the
product Pensbury Manor black hard rubber pen potion No.9 see
www.pensburymanor.com. The
white lettering can be refurbished by first making sure that all dirt
and polishing compound is out of the groves, then run some thin white
paint into the groves. After the paint sets up for awhile, wipe the top
ot the knobs with some paint thinner to remove any paint that migrated
to the top. - Dave DuBois
Flocking the Glovebox by Evan Ford
I found flocking fibers, flocking glue, and a mini flocker at the
Woodcraft
store. I purchased a bag of brown fibers, a matching 8oz can of brown
glue, and a neat little air pump called a mini flocker. To apply, you
pull the inner tube out of the pump, fill it half full of fiber and put
it back together. Then you paint glue on the surface. Next, you pump the
inner tube inside the outer tube. There are small holes in the end of
the outer tube that shoot the powder fibers out in a cloud. You aim the
tube at the glue and it quickly builds a nice felt like surface. The
glue has a 10-15 minute working time to apply the fiber. The glue needs
12-15 hours to fully set, then you can shake excess material off of the
surface and keep for re-use. It is recommended to not subject the newly
flocked suface to hard use for 4-5 days.
Quick Black Oxide Touchup
If you find your black oxide parts are in need of a little attention but
they are otherwise sound you can touch them up with a black Sharpie
marker.
Finishing Fuel Tank Ends
If you want the
original end panel look
you will need to scuff sand any place you want to have paint. That means
the rounded edges too. If you lay masking tape on the flat surfaces you
can then use 400 grit paper lightly on the edges. It just needs a bit of
scuffing. The tape will keep you from making a mistake.
Then when done mist coat the rolled edges and coat the center flat area
heavier so you sand out any blemishes. Once that is done and you are
ready for color I would remove the masking tape and then use some
lacquer thinner to remove any tape residue and primer paint edge.
Now comes the tricky part: When you put on the color you have to make
sure you are always painting from the center out so you don't put paint
on the chrome edge. Just mist the paint on the rolled portions so it
does not build up too much. Enough to cover but not to thick.
Once everything has dried (overnight?) then take a rag with lacquer
thinner on it and lightly wipe any overspray off of the chrome edge.
Don't bother with the edge that rests against the body. The factory
didn't.
When driving my car in mild climates I always remove the windshield
rubber from between the body and windscreen. If you don't, the natural
movement of the windscreen and collected dirt and dust will work
together to sand away your car as you drive.
Bug Screen for Radiator Grill
One of the most frustrating things about keeping your paint job looking
new is all the paint chips that flat radiator grill will get. One easy
way to protect the grill is to obtain a nylon widow screen material that
is a few inches wider than the width of the grill and shell. Open the
bonnet and tuck the screen in between the shell and bonnet on both
sides. Now you can drive about without bugs and rocks impinging on your
shinny radiator grill slats.
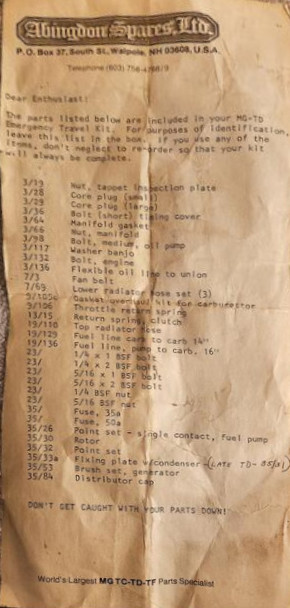
From John D of Davis, IL, an 1970's era Abingdon Spares kit.
Dear Enthusiast:
The parts listed below are included in your MG-TD
Emergency Travel Kit. For purposes of identification,
leave this list in the box. If you use any of the
items, don’t neglect to re-order so that your kit
will always be complete.
Whenever you get the chance you should convert your braking system to
silicone based or DOT 5 brake fluid. It is more expensive than regular
brake fluid but it will not harm the finish on your car. Regular brake
fluid will soften and remove all types of paints, even Dupont Imron.
Sooner or later one of your brakes parts will leak, ruining anything in
the path of the fluid. You must replace all of your rubber parts and
completely flush out all the old brake fluid during the change over. You
also cannot mix the fluid types so a label near your master cylinder
filler should indicate that DOT 5 fluid only be used.
Storing for Long Periods
There are many procedures that people take when storing their cars for
an extended period such as draining the fuel, disconnecting the battery,
putting the car on blocks etc. Most people forget to take care of the
finishes with the same amount of attention.
The finishes of your car need just as much attention, if not more. First
thing on my list would be to give the car a thorough cleaning, followed
by a good polishing. A treatment of the leather
with a leather conditioner as well as a vinyl treatment is in order.
Once you have the car all clean, polished and conditioned it is time to
store it away. What is needed is a dust proof but breathable container
(unless you have a humidity controlled environment to store your car
in). The easiest way I have found to do this is the following:
1. Obtain a large plastic sheet about 10' x 12'.
2. Lay the sheet on the garage floor over the area you will be placing
the car
3. Drive the car onto the center of the plastic sheet
4. Take care of any remaining mechanical needs for storage at this time
such as putting the car on blocks etc.
5. Be sure to remove or turn in any items that stick out and can be
bumped such as mirrors
6. Cover the car with a breathable car cover. Do not use a water proof
or plastic cover
7. Now roll the car cover into the plastic sheet at the edges creating a
cocoon for your car
8. Secure the rolled edges with clips or clothespins.
Installing 'Lift the Dot' Fasteners on Body
Many people complain that when installing the 'Lift the Dot' fasteners
on their cars bodies, the paint is chipped. While this does happen there
are ways to minimize or avoid this. First of all do not tighten the
studs down all the way to the body surface. Watch very carefully as the
stud approaches the body and stop just before it meets the body finish.
Another option is to get some clear #8 nylon washers and put them onto
the studs first. Get them small enough so they will not show when the
stud is screwed all the way down.
If the stud seems loose at this point you will need to do some repair
work first. You may try to add a bit of epoxy to the hole before you
install the stud.
For holes that are still loose then you will need to fill them first and
then redrill new holes. The easiest way to do this is to drill out the
hole with a drill the size of the metal opening. Do not use a larger
drill or the hole may show later. Obtain a piece of hardwood doweling
the same size as the hole. Fill the hole with epoxy and insert a short
piece of doweling flush with the body. Drill the hole out the correct
size for the stud and insert the stud as above using epoxy.
Side Curtain Bags
Side curtains are easily scratched and gotten dirty even when you are as
careful as you can be. The side curtain container is a real pain to work
with and its impossible to get the curtains in and out with causing real
damage. To prevent damage to your side curtains you might do what I have
down. Create a set of side curtain bags to protect them. I obtained a
soft cotton material that was the same color as the side curtains. I
traced out the shape of the curtains as they would be stored in the side
curtain box on two pieces of material allowing a few inches extra
material for joining the pieces. Next I decided where there should be an
opening like a pillow case in each bag. You may either close the opening
with zippers or Velcro. Finally stitch together the other three sides
just like a pillow case. Put each side curtain in its own bag before
storing per the instructions in the manual.
If you don't want to make your own side curtain bags,
Moss Motors has them for sale.
Item number 259-808.
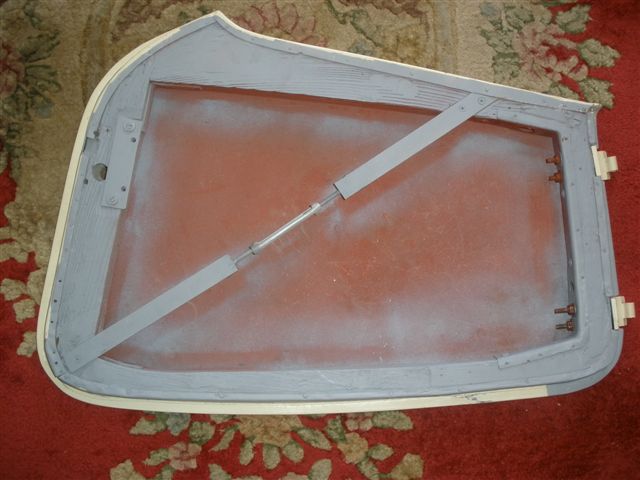
Attaching Hood to the Body Bucket
Originally the hood was secured to the three wooden strips on the back
of the body by screws and washers. This makes for a strong fastening but
there is a better way. Have you ever wanted to get to something in the
boot easily without climbing in the car? What about easily cleaning the
boot area? How about having a nice smooth tonneau without the bulge of
the hood underneath? All this and more can be achieved by replacing
those washers and screws with snaps. Place the snap studs on the body
mounting wood exactly where the screws would have gone or were. Install
the snaps on the hood under the flap to match up with the snap studs.
Snap the hood to the body. When you want access to the boot area or want
to put the hood down, unsnap the hood and it is out of the way. One
note. Generally the tensioner straps will have to be nailed to the wood
strips in order to provide sufficient tension.
Creating Chip Proof Tools
Cars are mechanical devices and tools are required to build and maintain
them. Tools are generally hard and have sharp edges. its not a case of
if you are going to drop a tool on your new paint job or scratch a
component while installing it, but when. To help in this area you should
always use the smallest tool that you can. Also try to use combination
wrenches or box wrenches whenever possible with the free end the box end
. One last tip is to coat your tools with rubber. Obtain a tool rubber
dipping solution from your hardware store. Dip all your hand tools in
the compound and let them dry. After they have dried take a sharp knife
and cut away the rubber from the working surfaces. Now if you drop the
tool or brush up against another finished component, there will be less
damage done than if you were using raw tools.
Replacing the Starter Motor
The manual would suggest the you disassemble the entire front exhaust
system to replace the starter. The truth is that it can fit in through
the chassis from the side just in front of the 'A' member and under the
frame stiffeners. The problem is you will scratch everything including
the starter while doing this. To prevent this first obtain an old clean
T-shirt. Insert the starter in the T-shirt and then poke it through the
hole, head first. Insert the starter into the flywheel hole by pulling
back the T-shirt to expose the shaft. Secure the two bolts by hand and
then remove the T-shirt and tighten with wrenches.
Removing the hood?
One person who is strong can remove the hood by themselves but it is
safer to do it with two persons. Take the whole hood out at one time.
Simply open each side of the hood at one time and undue the machine
screws at the front and wood screws at the rear. Open the hood so it is
vertical on both sides and remove.
Moss Motors has a
tech tip
that explains how to remove the hinge pins without marking them up or
damaging the hood.
Start in the center and push the rubber against the metal while tacking
the rubber to the wood area. Put a little tension on the rubber to the
outside as you go. Put tacks about every 3 inches or so. When you get to
the corner where you are having problems then you will need two persons.
One person pulls a lot on the rubber while at the same time pushes it
hard against the lip. The other person tacks. Space the tacks about 1
inch apart in this area and once you have cleared the turn go back to
about three inch spacing.
Fastening the rubber treads into the running board strips
Cut the rubber a little longer (~½ inch) than the slot. Then take
a knife and cut a V shape on both ends. Take the rubber strip to a
grinder and round over the top of the V's. After that spray with
Armorall or some other rubber lubricant. Push one end of the rubber
strip into the slot and start working with a flat device to push the
other edge into the groove. A piece of wood or plastic would be best.
Make sure that it has rounded edges just in case you slip so it won't
tear up the paint. Work your way down to the end, pushing the material
back as you go. Tuck the end in and then the compression of the strip
will tighten the fit.
Restoring the original finned oil sump
Many times the original oil sump has been damaged by misuse. Many times
the fins have been broken or smashed. To repair this takes time but it
is not impossible. First make sure that the sump is clean (free from
oil) on the inside and out. It would be best if it is bead blasted on
the areas to be repaired. Then take the sump to a talented heli-arc
(aluminium) welder. They can lay a bead of metal down where the missing
fin section should be. You will then have to carefully grind the correct
shape into the pan. Follow up with a beadblast to give a uniform texture
and then clean thoroughly. You must remove all the sand of else your
engine will regret it later.
Repairing stripped out threads in cast aluminium parts.
Aluminium is very soft and it is easy to strip the threads on these
parts. In addition it is not uncommon to find someone who got lazy and
forced an incorrect thread into a part, rendering it useless for the
original bolt. You can try to rethread these with a correct tap but many
times you will need to replace the threads. Take your part to a machine
shop who can insert a heli-coil into the stripped hole.
All of you who have been around me for any length of time have heard me
preach about keeping the fan belt on the T series cars loose. A tight belt
will do really bad things to the generator (kind of like what over tight
underwear does to a person, but that is a subject for other publications),
like causing excessive wear on the rear generator bushing and in severe
cases, actually wearing through the bushing and into the housing. It also
causes sloppy water pump bearings and water leaks according to Stuart
Locke, who has rebuilt numerous generators and water pumps for people that
keep their belts too tight. The same thing is true for the MGA and the
early MGBs that use generators rather than alternators. I have always
followed my own advice and kept the fan belt in our TD EXTREMELY loose. So
you can imagine my surprise a couple of months ago when I traced the
source of squeaking in the engine compartment to the generator armature
rubbing on the field poles because the rear bushing was worn excessively.
I pulled the generator and did a quick overhaul, cleaning it up, replacing
the rear bushing and brushes and repainting it. Then I started puzzling
out why the rear bushing wore so quickly (if you consider 15 years to be
quick). Interestingly, at the same time I was working on an article,
Stuart Locke was doing the same thing some 600 miles south in Sunnyvale.
His article arrived about two days after I had given mine to Liz for the
Bonnet, so after consulting with Stuart, I am combining the two articles.
Since the fan belt that was originally on the car when I bought it in 1974
was a bit over sized, I had replaced it when I restored the car in the
early ’80s. At that time the belts from Moss were a solid and very stiff
belt, but I didn’t give that much thought at the time. In revisiting the
situation after rebuilding the generator, I took a more critical look at
the belt I had been using and dug around until I uncovered the original
belt (the one that was too long). What I found was that the original belt
was a Gates Green Stripe belt that was segmented on the inside edge and
was, therefore, a very flexible belt. When installed, it could be run very
loose and as a result, put very little sideways pressure on the generator
pulley, which results in very little pressure being transmitted to the
rear bushing through the armature. I then embarked on a search for one of
these really flexible fan belts and, through trial and error and a very
helpful auto parts store in Bremerton who special ordered goodness knows
how many different sizes of belts for me from Seattle, found the proper
size Gates Green Stripe II belt. This belt is also segmented on the inside
surface. Although the segments are much wider than on the original Green
Stripe belts, it still results in a much more flexible belt than what I
bought from Moss. The part number on this belt is TR22392 and it is a
11/16" x 39 3/4" (17mm X 1010mm) Truck and Bus series belt made
by Gates. In his article, Stuart tells us that the Goodyear 22394 belt is
22/32" x 39 1/2" (17mm x 1005mm) and that the Moss belt is not
only very stiff, but is also considerably shorter at 17mm x 925mm (about
three inches too short), which I found when I was special ordering all
those belts trying to find the right one. Additionally, Stuart found in a
1949 book, Exploring Auto Mechanics by Harold T. Glen, that the fan belts
on the TCs and TDs (and by extension, the TFs) should be adjusted to have
ONE INCH of slack between the generator and the water pump (not on the
longest leg as we are used to).
By the way, as I said earlier, the same problem exists on the MGAs and
early MGBs, but is not so pronounced since they use the later style narrow
fan belts which are much more flexible than the ones used on the T series
cars. The fan belt still needs to be run quite loose (one half inch of
slack between the generator and the water pump, rather than on the longest
leg) on the MGAs and MGBs to prevent premature wear on the rear generator
bushings.
My source for the belts over here in Kitsap County is Westbay Auto. Those
of you in Seattle, Tacoma and other areas will have to check around for
the Gates belts. So now you have no excuse not to loosen up and get
comfortable.
Some additional sources and part numbers for the proper belts: NAPA
25-22392 UAP (Canada) 15A0995 DAYCO 22385 (15A0980) Available at a variety
of auto parts stores.
