|
|
|
|
|
|
|
|
|
|
|
|
|
|
|
|
|
End of Menu Items |


Y 3222 - "MG D Type Replica Special" 
 |
 |
 |
 Australian Motor Sports |
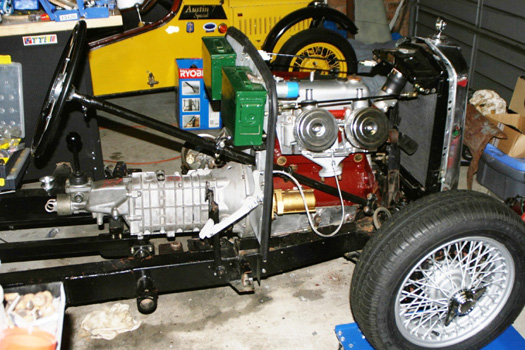
Attached are some recent photos of our MG Y 3222. We have recently commenced on rebuilding the car after having it in storage for 2 years. I purchased the car on eBay in one of those moments of inspiration and enthusiasm that leads to cautious and carefully considered words of explanation to ones wife.
The chassis had been modified to take a Buchanan style body with the gearbox cross member being sectioned and lowered to allow the motor and gearbox to be moved back and down. We however, were after a larger tourer style car to supplement our A7 roadster special that is mainly used to terrorise the locals on Sunday mornings. So for the body for the chassis we have chosen to replicate the MG 1932 D Type Tourer, a YD ? This meant moving the motor and gearbox back to it's original position and redoing the gear box cross member. This in turn lead to the 5 speed conversion, well this and the original explanation to my wife that included: "yes, it will be easy for you to drive if we do a 5 speed ..."
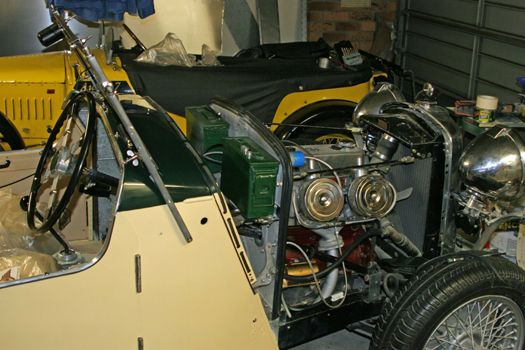
The photos shows the pre-war style firewall under construction. Note the 0.303 ammo boxes serving as fire wall tool boxes
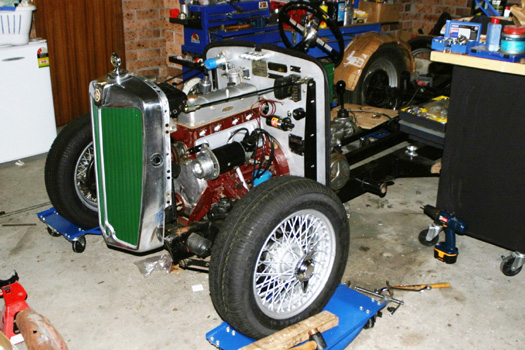
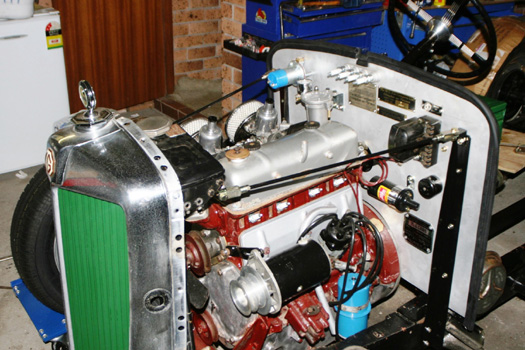
To date we have completed the fitting of new wire wheels and the 5 speed gearbox conversion.
We have commenced constructing the rear section of the body using the basic theory of building from the inside out. We have fabricated the transmission tunnel with hand brake mount, the rear kick panel and the inner wheel tubs. The rear inner wheel tubes have been fabricated from Harley motorbike after market rear steel guards, these were split and joined to achieve the greater circumference needed. The rear shock conversion published on the MG Y web site was fitted in conjunction with a sub frame to support the new reproduction MGB fuel tank. This tank is a nice fit between the chassis rails and even has the filler on the correct side
 |
 |
 |
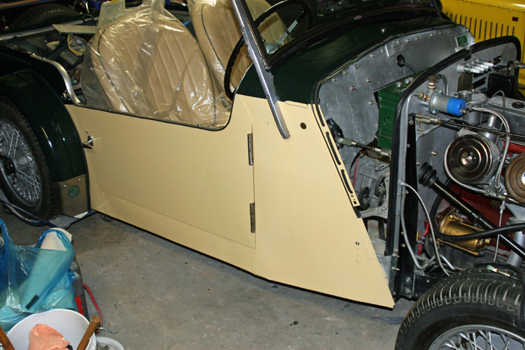
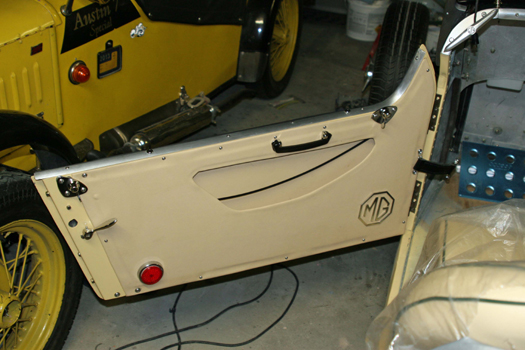
The body framing is now almost complete including the doors that have been skinned with a sheet of 3mm aluminium over the 19x19mm frame. The aluminium has been bonded with neoprene double sided tape to avoid electrolytic reaction with the steel and then fixed with countersunk rivets. The rivets will be filled and sanded to give a smooth panel. The door skin is fabricated from a 3mm sheet to simply give the overlap around the door opening. Hinges are stainless steel with bearings for a smooth action and are rated to over 100 kg. The door locks are sourced from a bug eyed sprite and modified to open from the outside using exterior door handles from a TC.
 |
 |
 |
The screen has been trail mounted to ensure the body tub is the correct width, this is a critical dimension and requires careful checking during design and construction. The tub front bulkhead has been fabricated from 3mm aluminium and bracketed to support the heater. The heater is a core with 2 fans in one unit and is sold as a module for hotrods.
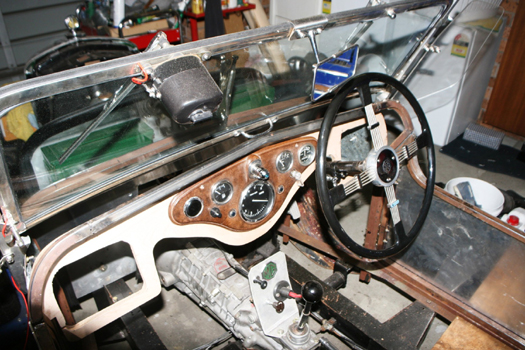
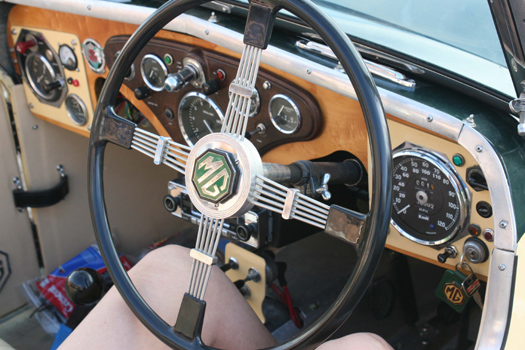
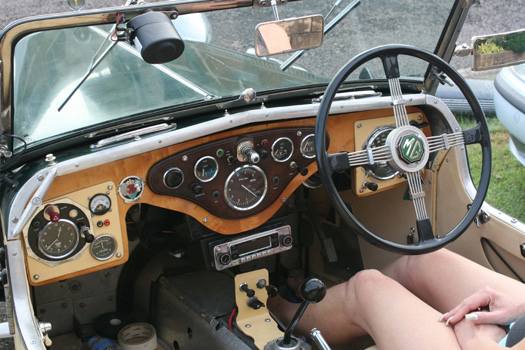
The dash has been mocked up as shown in the photos from 15mm waterproof ply and the original glove box holes will be covered by instrument panels to carry the 125mm 120 mph Smiths speedometer from a Jag (optimistic but looks great!) and clock for the passengers side. The dash will be veneered with some well seasoned and rare birds eye Huon pine to match the beige upholstery.
The next stage is to complete the framing, prime and sheet with steel. We may cut the floor boards before sheeting to allow easier access for measuring and trimming.

 The framing is now complete and we decided to cut the floor boards prior to sheeting the body, this also included the base and back board for the rear seat. We chose 15mm water proof ply that was sealed with Teak Wonder sealer and dressing. This a marine finish that unlike clear varnish does not scratch when the floor board are removed numerous times to access the below floor bits and pieces. This ply when sealed gives a similar performance to marine grade ply at less cost.
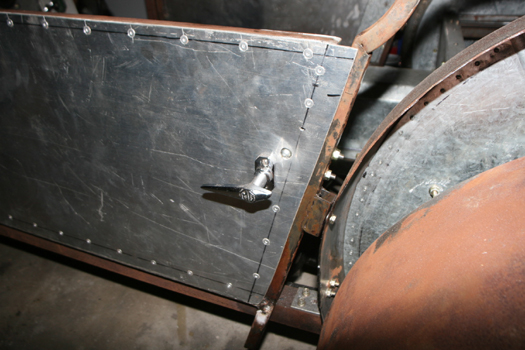
We have now moved on to sheeting the body with 0.55mm mild steel, we used galvanised finished sheets that will leave the inner surfaces with a durable finish and is easily sanded away from the outer surface where needed for welding and filling. The sheet steel is riveted to the tubular frame with steel rivets set with a nematic rivet gun. These guns are great especial when there are so many rivets to set at 20mm centres. Where necessary the steel rivets are converted to spot welds using a TIG torch.
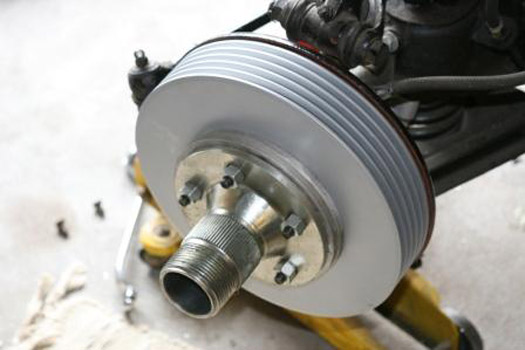 On the mechanical side the brakes are now finished including the plumbing to and from the remote brake booster (type: VH44). The booster uses 3/8 UNF fittings for 3/16 dia pipe, this was initially a problem as the master cylinder and fittings on the Y are 7/16 UNF with ¼ dia brake pipes. There are no 3/8 fittings for ¼ pipe however, there are 7/16 UNF fittings for 3/16 pipe, problem solved. We have also fitted some very nice cast iron finned brake drums originally drilled with 6 holes for a TC. There is enough space to redrill the drums to 5 holes to match the Y type hub. The photo also shows the splined hub for the wire wheel conversion, this is fitted using a 16mm spacer and 60mm mini cooper wheel studs that fit the Y type hub, just knock out the old and knock in the new.
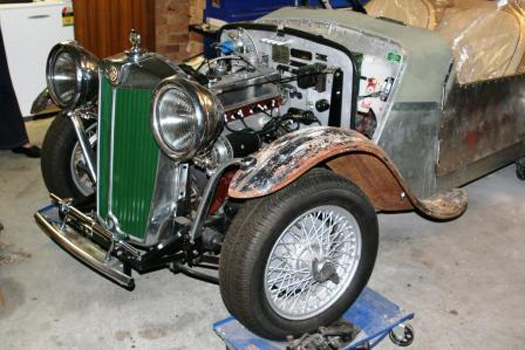
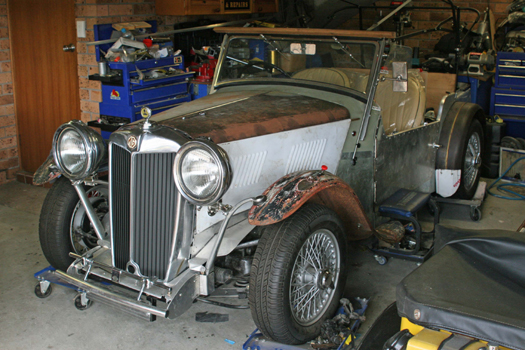
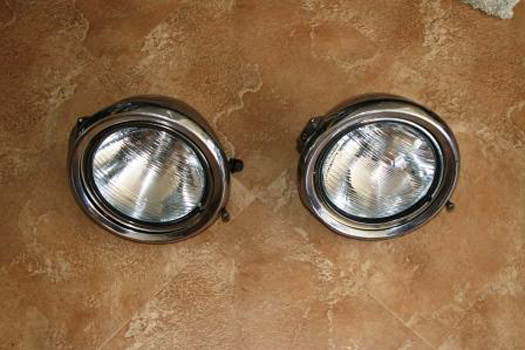 My wife felt that the original lights were too small and it needed "big bright eyes". With this brief I found at pair of Lucas P80s on ebay these were only shells but were soon mated to some 8 inch semi sealed beams with halogen bulbs. The small dents easily knocked out with some gentle tapping and with a little effort they polish up a treat. Now we do have big bright eyes.
![]() To provide some relief from body building we finished off the dash using some nice veneer to match the beige upholstery and numerous coats of polyurethane finished with 2000 wet and dry. The instrument panels are now complete and include clock and volt metre as well as a hazard switch in case the finished car fails to proceed.
To provide some relief from body building we finished off the dash using some nice veneer to match the beige upholstery and numerous coats of polyurethane finished with 2000 wet and dry. The instrument panels are now complete and include clock and volt metre as well as a hazard switch in case the finished car fails to proceed.
So for now the panelling continues towards the rear of the car and end at the end.
 |
 |
 |
Work has been progressing with bursts of effort on Saturdays followed by aches and pains on Sunday.
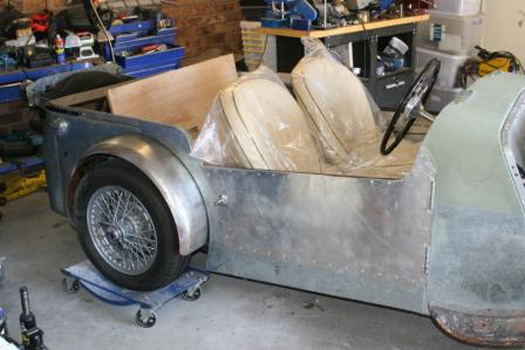
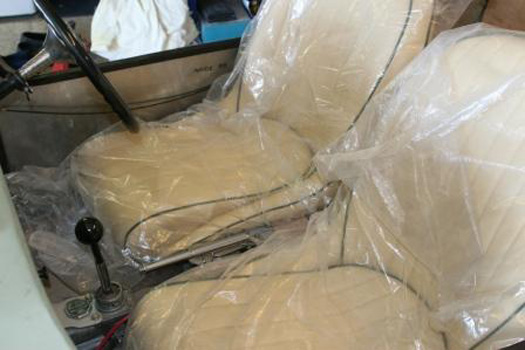 On the interior front, the ply flooring was fitted prior to the outer sheet metal, the rear seat base and back board can be seen in the photos. Vicki and I have tried the seats for size and found enough room, perhaps even more than some modern hatch backs.
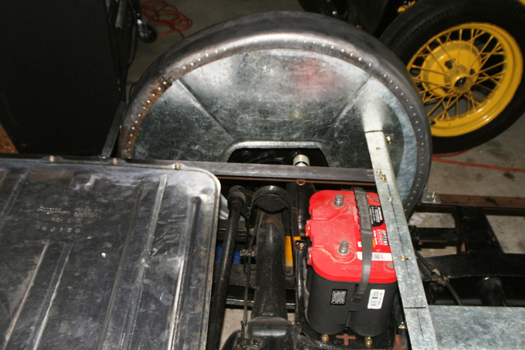
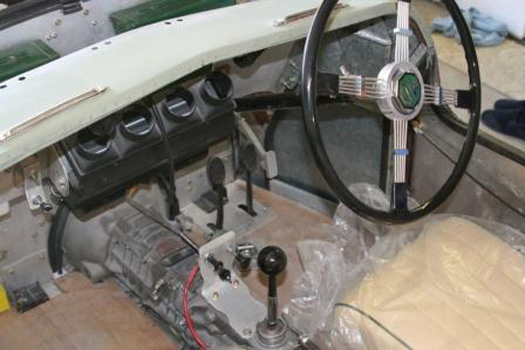 The rear scuttle was installed and supports the heater module, 2 of the 4 outlets are feed to the vents on the dash top for screen demisting and the other two will each discharge into the foot wells. In the photos you can see the Toyota 5 speed gearbox with a pre-war MG style control panel for the choke cable, starter switch and battery isolation switch. This was a convenient location as it is on the route for the main power cable from the battery to the engine compartment.
The seats where made by Cobra and are good fit with a period look. The rear seat will be upholstered to match.
 |
 |
 |
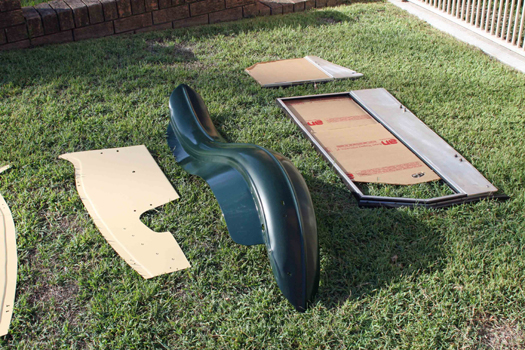
 The sheet metal has been fitted to the tub tube frame. In the photos you can see the initial fabrication and fit of the rear guards. The use of a timber pattern during the fabrication of the wheel tubs resulted in a good fit of the guards to the body.
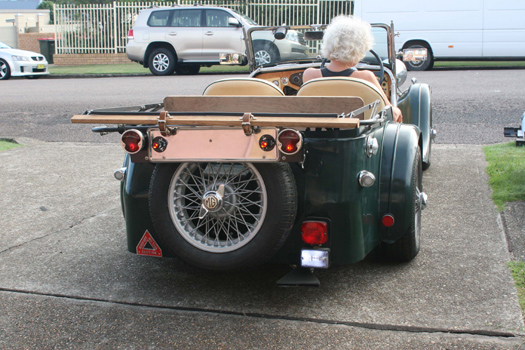
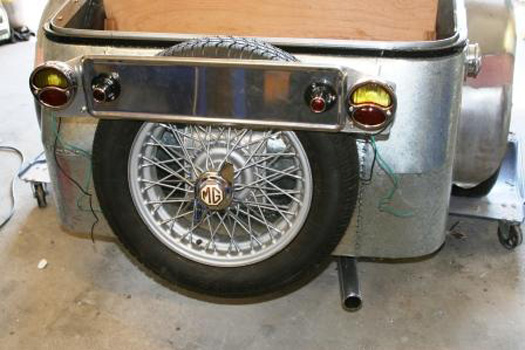 The tail light panel has been mocked up and trial fitted, we chose 30's style Duolamps with and amber section for indicators. The lamps also have amber LEDs that produce a good strong colour.
At the front we have mocked up the fit of the cast alloy guard brackets to the pre-war guards we found on ebay, from a wrecker in Brisbane. A gent from the Morgan club suggested these may be from an F type Morgan. While a good fit to the wheel radius, they need some welding and panel beating to finish. This will be aided by being made of heavy gauge steel.
The next stage is to fabricate the bonnet valance panels and front stone tray and then stopping, filling and priming of the body. This is usually a dusty time consuming business, at least it is a change from tin bashing.
 |
 |
 |
We are looking forward to painting some colour on the car, we have chosen to use 2 tone: Jaguar New Dark Green and Sandstone Beige. With luck we will painting colour by Christmas.
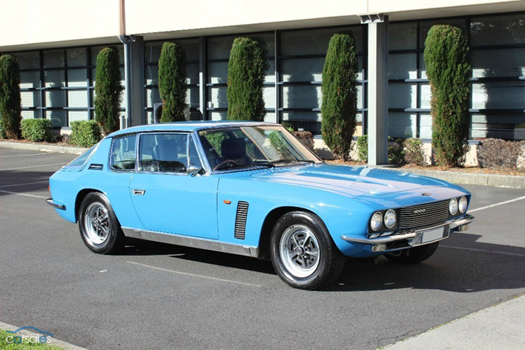 We have been grinding away at the building of the MG as time, work and family permit. There have been other distraction such as my wife Vicki falling love with a pacific blue 1969 Jensen Interceptor Mk11.
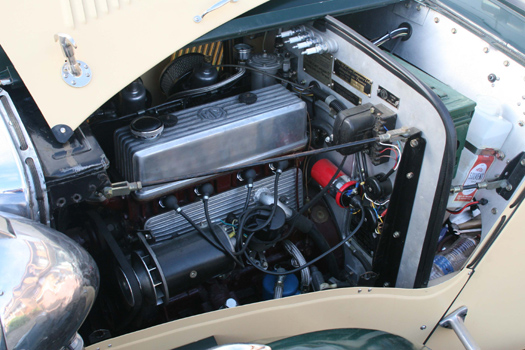
The Interceptor came at the same time I was wiring the MG, this was not a good omen as the Interceptor had on board many electrical gremlins courtesy of Lucas Prince of Darkness. There was a risk they would attack the fresh wiring in the MG with zeal. However, after 2 weeks of work the Jensen was gremlin free and the wiring of the MG was complete behind the dash and connected to the engine. The MG engine burst into life with the first hit of the starter and runs smoothly with no rattles or smoke.
 |
 |
 |
The painting is complete excluding the bonnet top and sides, when everything else is complete, these will be finished and fitted to the car straight away to avoid damage during storage.
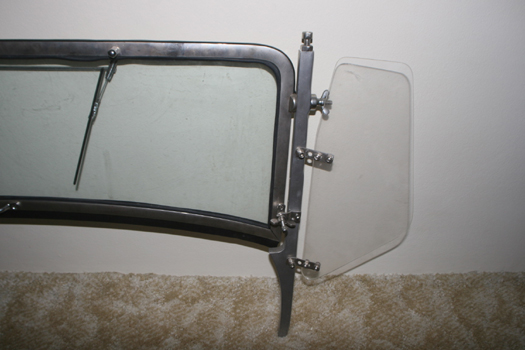
The trim is under-way using aluminium sheet rather than ply, this should provide durable and waterproof panels. The side screens are complete, these include sliding widows in case we miss the breeze when they are fitted. The hood frame have been fitted. The frame is from an American kit for a 32 Ford roadster. The main section of the hood needed to be lengthened by about 300mm, the frame had enough built in adjustment to allow a good fit to the car.
 |
 |
 |
Very soon there will have to be a few quick test runs around the block ...
Well another year of the restoration of Y3222 has come and gone. It has been 6 years! This seems a protracted process, but the average time spent is only 4-5 hours per week with a continuous burst during the holidays ( this wearing thin with my wife....)
We are now at the end of the "Tunnel" and using our own lights! The wiring is now complete and all systems light up, sound or flash as required. The main departures from the original Lucas wiring scheme was the use of a pre-wired 12 channel fuse and relay block. This is an American system for wiring hotrods and a good basis for those needing to start from scratch. Additional relays were used to direct power directly to the lights and horns rather than running through the switches.
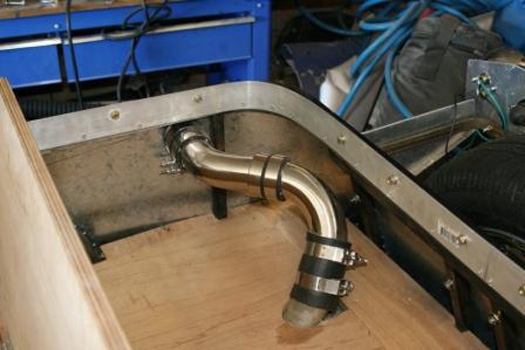
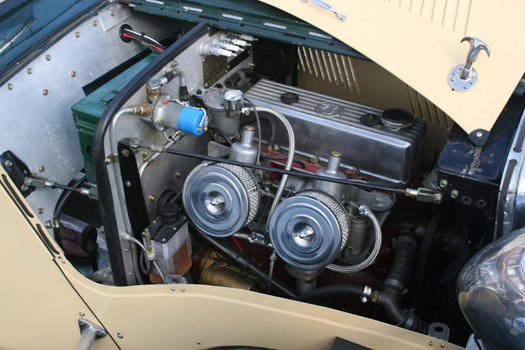
The rigid oil filter hoses were replaced by a flexible set and this solved most of the oil leaks straight away. The original hard lines never seemed to seal at the joints no matter what style of washer was used.
A vacuum feed for the valve seat saving additive for the unleaded fuel was added and this came with a nicely made needle valve and glass tube to adjust the vacuum feed to the required drips per minute.
The next steps are to visit the trimmer for the hood, tonneau and upholstery of the rear seat. The hood and tonneau fabric has been sourced and is a great looking German made double duck, dark green on the outside and black on the inside. We have not made up our minds whether to line the inside of the hood or not? The rear seats will be pleated and piped to match the fronts that were made by Cobra.
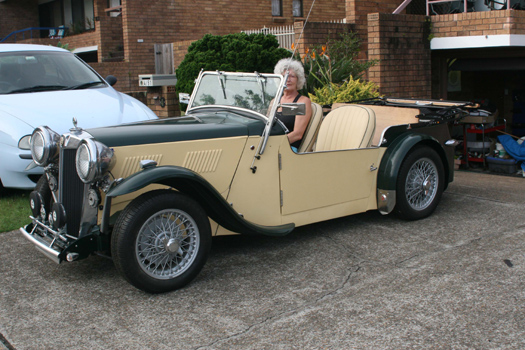
There is a surprising amount of room in the back seat for the Mother in Law and the cardigan corgi "CC". We are looking forward to some touring holidays taking along CC.
 |
 |
 |
 |
 |
 |
 |
 |
 |
 | ||