
By John Lambie (TF 5877) and Rob Grantham (TF 3719).
This article has been written in two parts. In Part I John Lambie (TF 5877) deals with seat re-upholstering and in Part II Rob Grantham (TF 3719) describes the interior re-trimming process for the remainder of the car.
During the last five years, the overall standard of T-Type interior restoration has risen tremendously. This has partly been due to trim kits being produced which are of excellent quality and preserve originality to the last stitch. Although the task of doing your own interior will possibly not be seen as an easy exercise, the rewards at the conclusion of this critical part of T-Type restoration will certainly make the effort worthwhile.
The following account refers specifically to fitting an interior kit to an MG TF but the principles mentioned can also be applied to other T-Types. The kits used in many Western Australian cars are made by William M. Collingburn, North Yorkshire, England. These interiors provide a magnificent finish to many restorations.
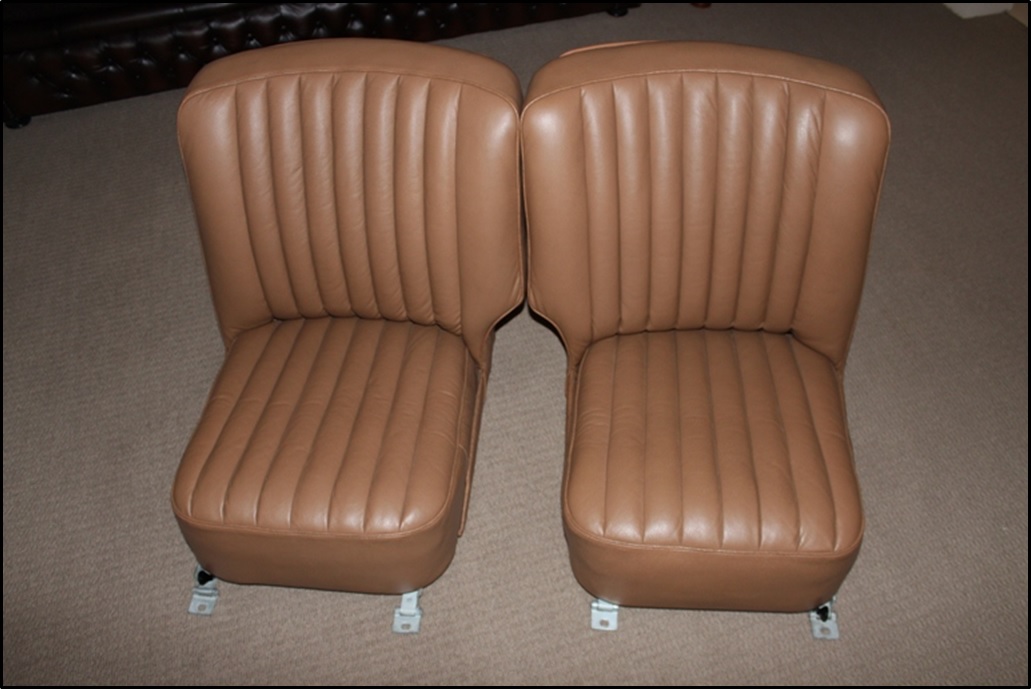
The re-covering of seats (usually covered with black vinyl by now - ugh!) provides a good starting point for your interior re-fit.
Dismantle the seats; remove the cushion squab from the seat frame by removing the eight (8) countersunk screws which secure the seat runner frames. Carefully remove the tacks and strip off the old leather (or more recent vinyl covers) from the cushion and seat frame.
Examine the plywood base for warping, splits and rot. If necessary re-make the bases from waterproof plywood using the old part as a template, undercoat and paint. Check the dunlopillo cushion for wear, splits, rot. (I doubt whether these are available now, although a new cushion can be re-moulded using density graduated plastic foam if necessary). Splits and small repairs can be made using contact cement and cotton tape. In my case, the driver seat cushion was in need of repair and after gluing up splits in the cellular underside I covered the complete top with ½-inch foam and trimmed to shape.
The cushion is then attached to the base with 1½-inch cotton tape. The original tape was very light and prone to splitting so I used a tougher herringbone tape (obtainable from motor trimmer suppliers). This is attached to the cushion and the base with contact cement. A piece of 18-inch x 6-inch, ¾-inch cotton wadding is then lightly glued across the front edge and half way back along the sides of the cushion prior to fitting the leather cover. (To attach the wadding I used 3M 90 High Strength Spray Adhesive).
Clean the seat frame, remove rust with a wire brush and paint with kill rust enamel. Check for broken spot welds and re-weld if necessary. Check the wooden tacking laths and replace if split, rotted or missing. The tacking strips are important if a good job is to be done, so replace if at all in doubt. These are attached to the sheet metal seat frame with bifurcated rivets. Check the felt padding, back support springs and the seat padding.
In the TF the seat padding was made from coconut fibre and this may have crumbled or compressed through use. Coconut fibre inserts are sold in garden centres for lining hanging baskets. The matting is about 2½-inches thick and is loosely glued to an open fibreglass backing. I obtained 24-inch inserts and using the seat as a pattern cut them to shape. To hold the fibres in place I also sprayed both sides with spray adhesive. The original fibre in my seats had compressed a lot and had bulged between the seat back springs making the seat back very baggy. I left the original fibre in place and placed the newly cut ones on top (when the leather cover was fitted the seat was firm and returned to its original shape).
Fit the new cover starting from the top and after centralising the pleats to match the seat squab, attach with tacks to the top tack strips. Make sure the tacks are low enough to b e covered by the seat back when it is finally fitted. Pull down the covers very tightly, compressing the padding and springs and attach the canvas cloth to the lower tacking strips. The leather can be pulled very tight and should be done evenly to remove any diagonal wrinkles.
The sides are pulled tightly and after ensuring the piping flats are folded the right way (preferably to sit into the compression in the felt from the original covers) the edges are pulled over and tacked Check with your eye to keep the piping along the seat edge straight. Repeat for the other side.
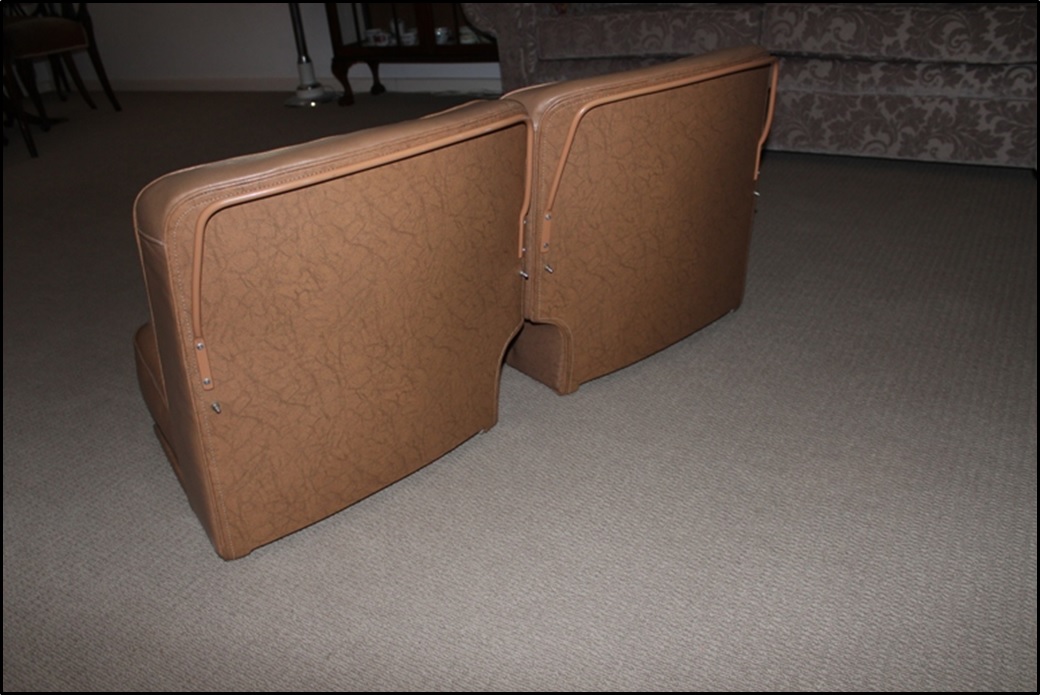
The seat back is next. Insert tacks by hand, pushing through the piping as closely as possible to the stitching space, with the tacks about ½-inch apart. Bend the fibre back and position against the seat back covering evenly the top, bottom and side edges. Tap evenly on to the edge tacking strips by hammering on to a wooden block held against the hidden row of tacks. Tap home evenly until the piping fits up snugly and neatly. Re-fit the wire tonneau frame and then fit the dot fasteners.
The seat squab can now be fitted and the seat runners re-fitted.
After you have completed your seats, you can now tackle the remaining trimming with confidence.
Note: If you have a tatty, but original interior in your car and you are about to replace it with a new kit, keep every piece until the re-fit has been completed. The MG trimmers were skilled at their job and original pieces provide useful clues as to cutting, gluing, tacking and measuring.
Before proceeding with the interior trim panelling, lay out all parts that have to be PVC covered on a suitable surface such as the lounge room floor! (I have a very understanding wife.) These parts will include glove lockers, scuttle padding, side screen box components with lid, panel board (crank handle) and wood pieces – rear top body rail, and wood pieces-rear top body rail, rear hood fixing fillet, rear hood (wood) fixing corners, two rear fibre-board corner covers and two small pieces for carpet piping.
I ordered an extra metre of PVC in addition to the standard allowance-well worth it! It relieves the pressure when things go awry. With the exception of the rear wood top body rail, you can lay all other parts of the PVC and start measuring, chalking and cutting.
Some PVC measurements required for an MG TF are listed below:
| Side screen box lid | 37½" x 21" | (95cm x 53cm) |
| Panel board (crank handle) | 35½" x 9" | (90cm x 23cm) |
| Side screen box front plate | 39" x 9¼" | (100cm x 24cm) |
| Side screen rear metal rail | 37" x 4" | (94cm x 10cm) |
| Rear top body (wood) rail | 36" x 6" | (92cm x 15cm) |
| Rear hood fixing fillet (wood) | 39" x 3½" | (100cm x 9cm) |
| Two pieces for carpet piping | 6" x 2" each | (15cm x 5cm each) |
PLUS - PVC for rear fibre-board corners, glove lockers, rear hood (wood) fixing corners, side screen box side rails and scuttle crash pad.
Cut each PVC piece accurately as there will be little to spare at the conclusion of the job. If you have kept those original Rexine pieces (or borrowed same) use them as an aid of how and where to cut the PVC, thus giving each interior trim component a professional finish. All corners and ends must be neatly presented.
It is cheaper to buy marine ply for your side screen box lid and flooring from a boat builder rather than a general timber merchant. The boat builder I approached agreed to both supply and cut the pieces to size for a very reasonable price. Alternatively, if you have acquired a full wood kit for your car, the supplier will often have this wood piece included.
When affixing the PVC to the lid, I like to use new contact cement. This is a large area to cover and to attain a perfectly smooth finish you need fresh, free-running contact cement. Collingburn supplies the original type black tape/ribbon which on the lid’s underside covers the join of black felt and PVC. The black tape/ribbon is held in place by staples. (Use a hand staple gun). Note down the distribution and angling of these staples from an original lid.
If the tape is missing under your lid and you need an idea of the original format - the factory used approximately 20 staples at 45 degrees. As a general guide, on all components, apply glue to both the component surface and the PVC surface. This assists adhesion.
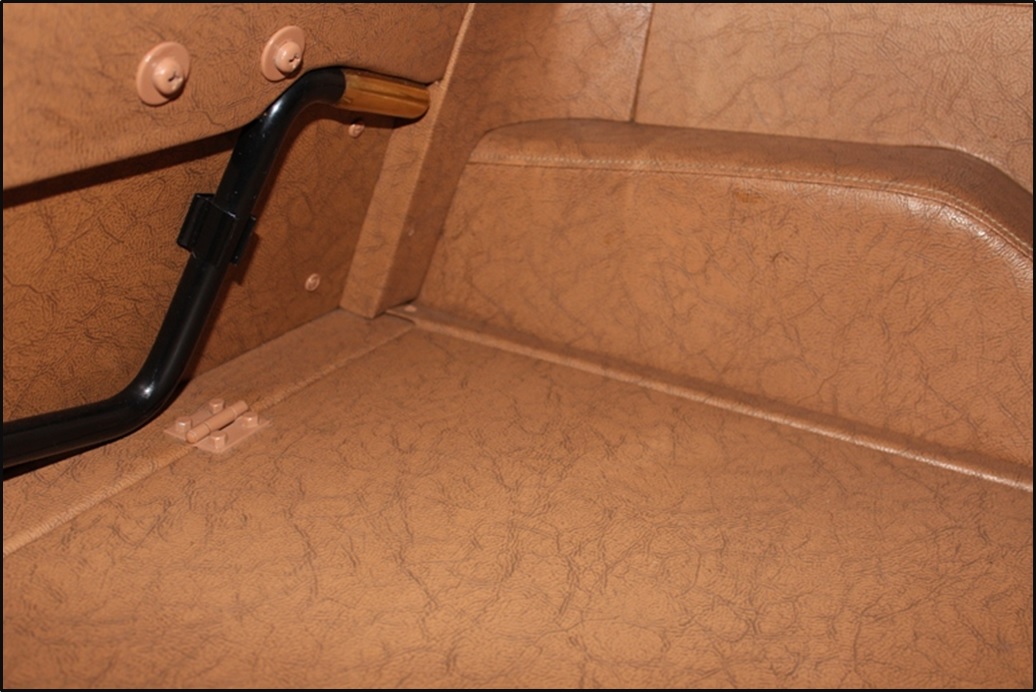
The wheel arch covers are made of PVC (originally Rexine) and are supplied with felt to fit beneath. The TD and TF wheel arches are glued into position. The type of contact cement you use for your trimming is important. General contact cement available from your local hardware store does not respond well to our Australian sun, so I used a stronger bonding cement 3M 90, available from any motor trimming and upholstery distributor.
Use a small amount of glue to position the pre-cut felting. Make sure that enough felting extends toward the side body panel to enable the side trim panel (plywood backing) to crush the felt and arch cover. Gaps between the side trim panel and the arch cover look unsightly. The underfelt pieces can be joined with tape after gluing for a smooth finish.
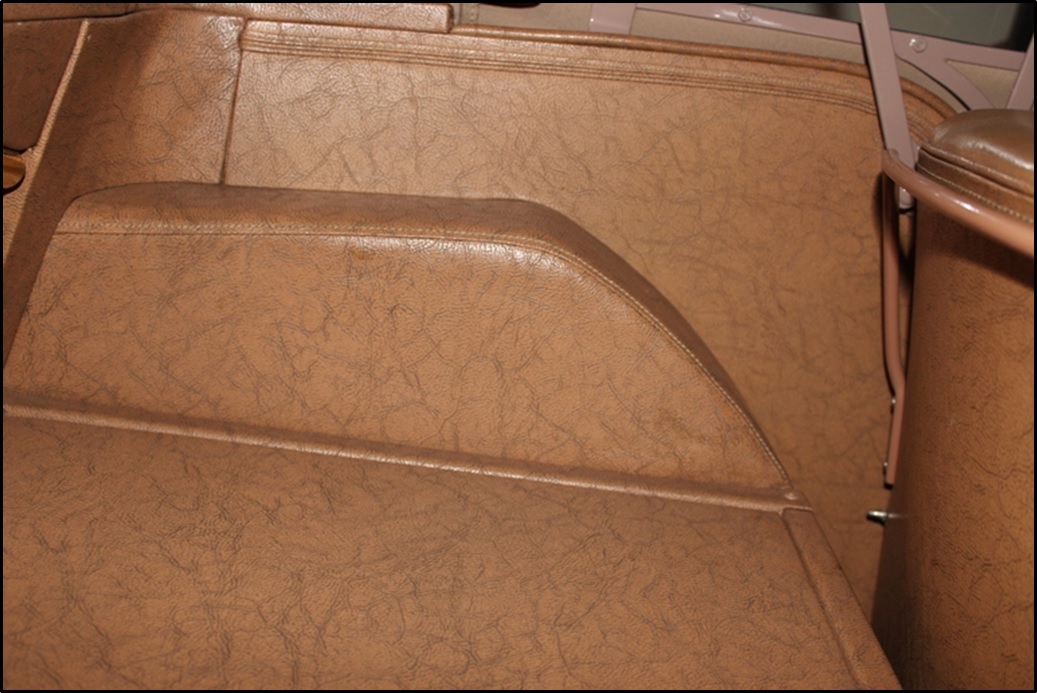
Apply a thin coat of contact cement to the under surface of the arch cover. Place the cover on the felted arch so that the cover's seam runs evenly along it. Unwanted wrinkles will be evident at this stage and so the fun begins! Keep pulling and stretching from the edges of the arch cover to eventually gain a drum-tight fitting unit. There is a small plywood tacking strip on the wheel arch (where the arch cover meets the vertical carpet strip) which can also be used to tension the cover.
On the TF these PVC covered panels are backed with 4mm new plywood. Start the piping (between the upper rear quarter trim panel and car body) by tacking the end tongue of the piping into the rear body side portion of the wooden body frame. The front ends of the hood (wood) fixing corners actually crush the piping and this held to confirm the correct, visible starting point for the panel piping.
This side trim panel must be pinned so that:
Initially use only a few tacks to position the piping and then check for any changes to be made by offering up the side trim panel. If satisfied, tack the piping down to the bottom of the rear door body pillar.
Before the side trim panel is pinned on the car, check to see where it crushes the vertical carpet's piping piece. This piping is stitched to the top end area of the rear Karvel carpet piece which is glued to the rear cross brace panel. The stitched on piping to this carpet piece is of course interior colour.
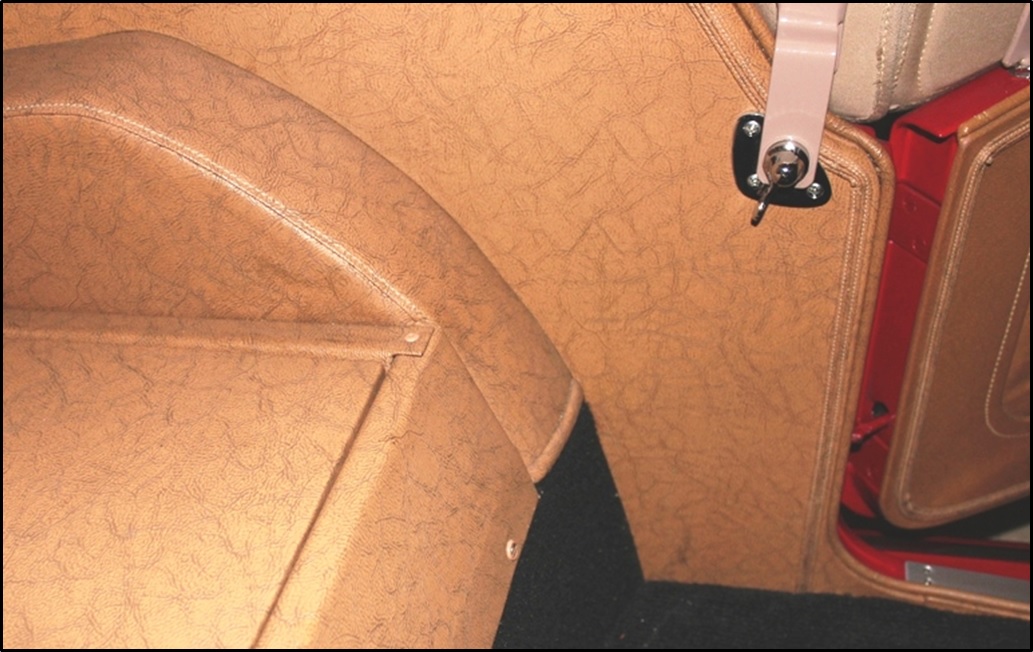
NOTE: When pinning the side trim panel to the rear door body pillar, remember there is only about a 2mm gap the length of this pillar into which the pins can enter wood. If the pin starts bending on hammering, you have probably hit metal. Withdraw it and using a new panel pin, angle it so that it can enter the rear body pillar wood.
After the individual frame components have been covered and the arch wheel covers and side trim panels fitted, assembly of the side screen box frame can begin. Using four (4) pop rivets, connect the two (2) side pieces with the rear side screen metal rail and the side screen box front plate. Now push the whole frame back hard into position.
It may at this point pay to check the actual size of the frame so that a perfectly fitting lid can be installed (T-Types that have been smashed in the rear area have all sorts of irregular sizes). After fitting the lid hinges (to be painted the same colour as your trim) the lid strap can be attached. The strap is held on to the lid by two (2) Phillips head screws with two (2) washers and attaches by a press-stud to the side screen box front plate. To obtain a flush-fitting lid, attach the strap to the lid first and then pull the strap down the box front plate until the lid is seated nicely in its frame. Mark for the correct location of the press-stud unit. Drill through the front box plate and fit the stud.
As originally manufactured on MG TF door trim panels, the piping and tops of door pockets are always covered in leather. When fitting the door trim panels, checks must be made on door closure and suitable sealing "crush" between door trim panel piping and the general interior piping (sometimes you have to "rob Peter to pay Paul" here!).
Use only a few panel pins to temporarily position the door trim panel, taking note of the above points. If not satisfied, withdraw the pins and relocate the door panel and re-check for overall fit. If you are now pleased with the result, pin the trim panel to the wooden door frame.
Note:
The curved, wooden base on to which is applied the rubber crash pad usually breaks into a couple of pieces when prised from the body scuttle flange! However, don't despair. You may decide to cut out a new marine-ply backing or restore the original piece. If you decide on the latter course, the following points may be of assistance:
It is important to re-run the affixing studs with a ¼-inch BSF die. I like to have the studs cadmium plated. Originally there were also four (4) open-ended clips holding up the map light's wiring - they are often missing. Replace.
The crash pad was originally covered with Rexine by using tacks. A piece of piping (made around stiff 2mm diameter cane filler) is also tacked on to the upper aspect of the curved pad. I feel gluing, plus the use of tacks here is desirable. Make sure you allow enough PVC to cover the crash padding by taking into account the base curvatures.
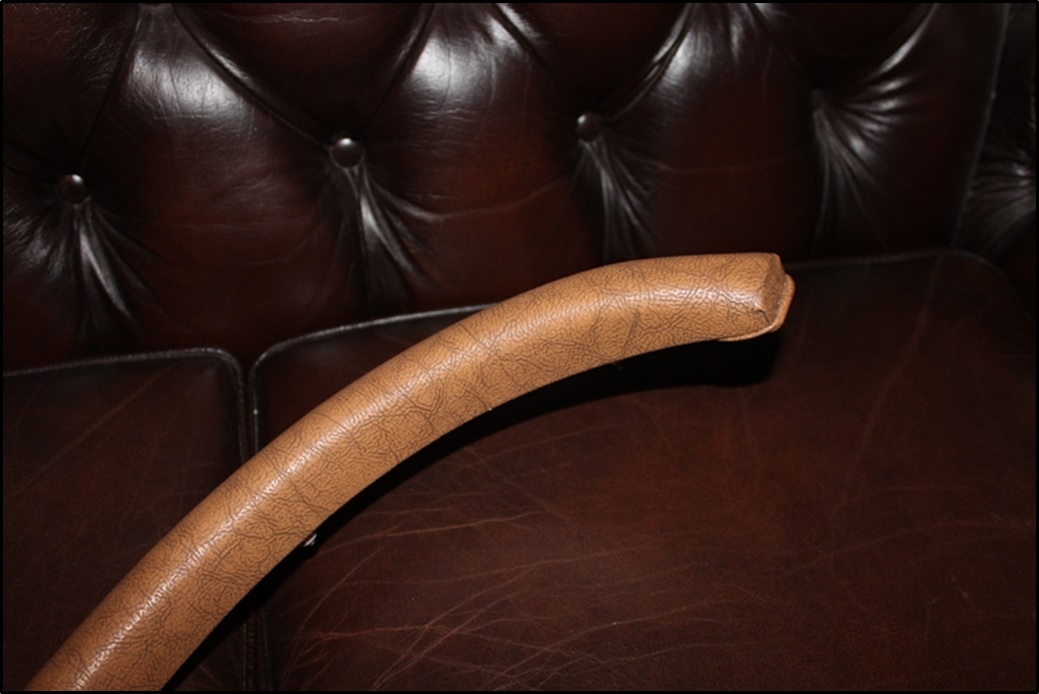
The end area of the crash roll covering needs to be tidy. Don't forget you will need to leave additional piping to go around the end of the crash roll and then return upward for about ¾ of an inch.
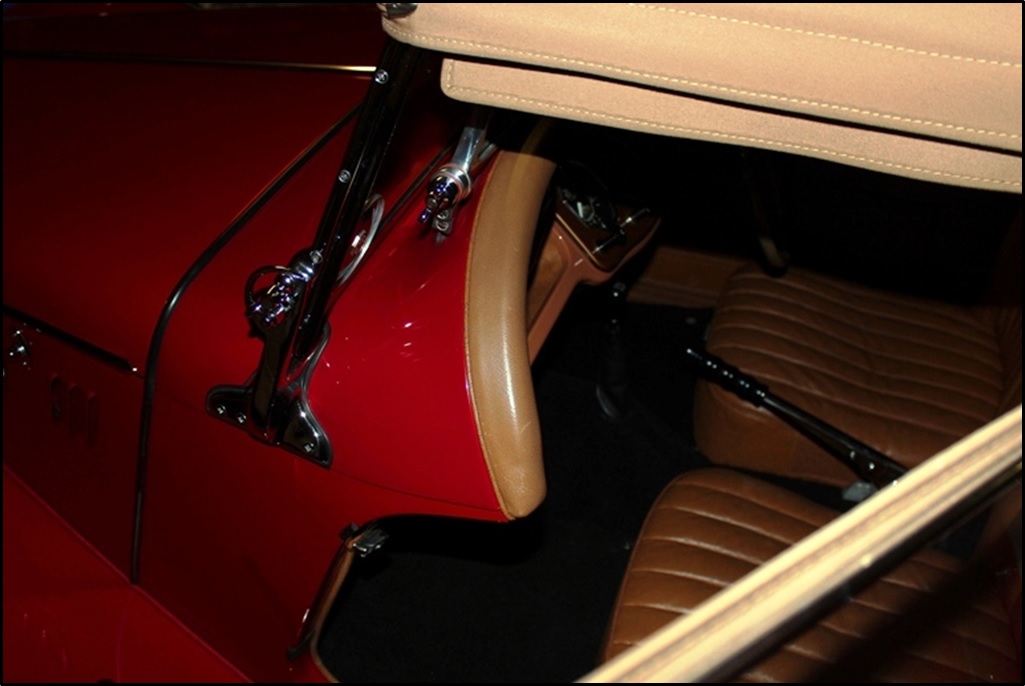
Ensure that the body piping supplied is tightly stitched around the internal filler. Start fitting the body piping from the rear of the car - between rear wings and the body.
Note: When the piping is finally fitted between the front wings and engine side panels, TF owners will notice there is about 120mm left over. Don't cut this off! Remember you will need this piping to fit between the front stone guard and the bottom flange of the front wings.
This panel is supplied in black fire-board for the TF. This panel covers wiring and cables and is often missing from cars. The under dash metal frame is also often missing but it is easy to manufacture. Take measurements from a fellow TF owner's original unit and make it yourself or seek out a local sheet metal factory.
When ordering your trim kit ask for a set of chrome-plated, countersunk Phillips head wood screws. These screws are supplied in different lengths and gauge and were used originally on trim parts, i.e. securing the rear hood fixing corners and fillet wood piece, various hood bracket fittings and part of the internal scuttle trim.
In conclusion, re-trimming is generally not to be considered a facile process. However TF owners, who are keen to adhere to points of originality and are prepared to accept the challenge of tapping untried skills, will enjoy the product of their achievements for many years. "Go to it!"
ROB GRANTHAM (TF 3719)
Perth, Western Australia
December 2013
Home | History | Details | Technical | Literature | Gallery | Links | Map
| © 2002 - by mg-cars.org.uk | Page last updated on March 2, 2019 |